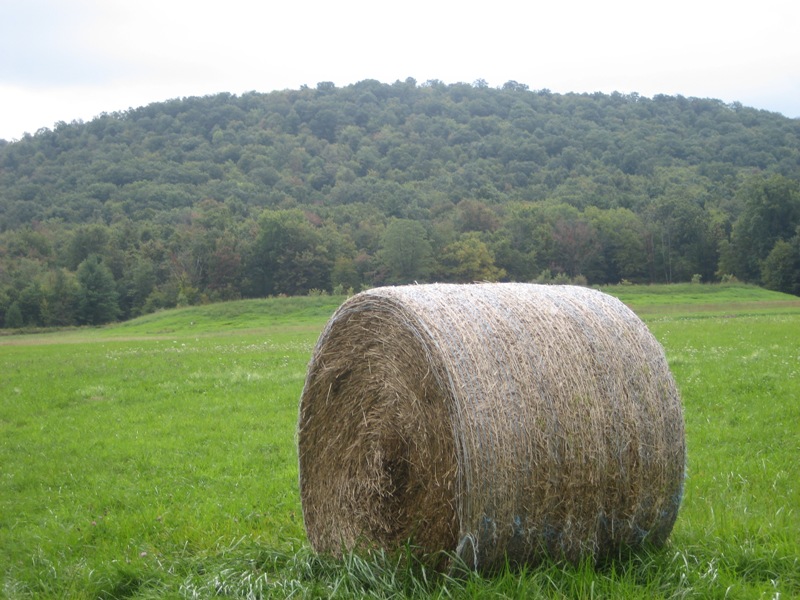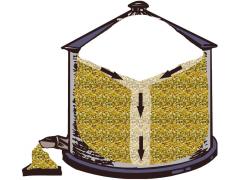
Silo Fire Prevention and Management

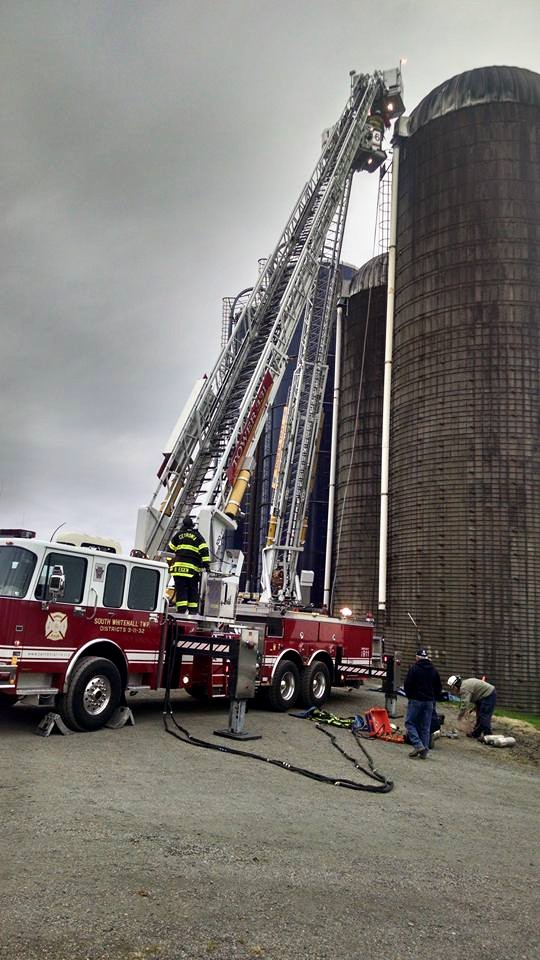
Rescue trucks at silo

Photo source: Penn State University


Use the following format to cite this article:
Silo fire prevention and management. (2015) Farm and Ranch eXtension in Safety and Health (FReSH) Community of Practice. Retrieved from http://articles.extension.org/pages/70637/silo-fire-prevention-and-manag….
 

Because the ingredients needed for a fire to occur are present in silos, agricultural producers who have silos should take steps to minimize the likelihood of silo fires and be prepared to manage silo fires should they occur. Fire prevention steps are similar regardless of what type of silo you have. The approach to managing a fire, however, is based on the type of silo in which the fire is burning.

Ingredients for Fire

Three ingredients are needed for anything to burn: a heat source, air, and fuel.

  • The heat source for a silo fire is bacterial action within the silage. When forage material is cut, bacterial action on the forage begins. This action produces heat until all the oxygen in the pile is consumed. Microorganisms are killed at 250°F–400°F, causing a breakdown in the forage through an oxidation process called pyrolysis. Pyrolysis allows oxygen in the silo to support a smoldering fire that can result in charred cavities in the silage. Once the oxygen is consumed, the fermentation process begins and continues until the forage becomes stable. 
  • The air source for a silo fire includes air that is trapped in chopped forage during harvest and air that blows into the silo. The dryer the material, the more trapped air there is.
  • The fuel source for a silo fire is the silage, although it typically is not a highly effective fuel source because of its moisture content. Even dry silage is too wet to burn quickly.

Causes of Silo Fires

The three main types of upright silos found on farm operations are conventional, oxygen-limiting, and modified oxygen-limiting. Typically, silo fires occur more frequently in conventional silos than in oxygen-limiting silos because oxygen is present in greater amounts in conventional silos. Many silo fires occur in the top layer (approximately the top 10 feet) of dry, loosely packed silage. Such fires can be the result of an overheating unloader motor but more often are caused by spontaneous combustion. Spontaneous combustion can occur when new silage having a too-low moisture content (less than 45%) is placed in the silo, when fresh silage is placed on top of old silage, or when the silo has poorly maintained doors and walls. Putting new silage on top of old silage is especially risky if the old silage is too dry. The dryer the material is, the more air that will be trapped when fresh, wetter material is placed on top of it. That trapped air can allow excessive heating and support a smoldering fire.

A silo fire can start from a source outside the silo as well. The two most common examples of these types of fires are a fire in the chute from a shorted-out electrical wire or a fire from an adjacent barn fire.

Prevention of Silo Fires

Prevention of silo fires involves performing proper maintenance on silos and unloaders and taking appropriate steps when harvesting and storing forages.

Silo and Unloader Maintenance

When a silo is empty, inspect the silo walls (especially the lower 10–15 inches), the silo doors, and the unloader system. Make any necessary repairs. If you have an oxygen-limiting silo, pressure-test it on a regular basis (at least once every other year, preferably when empty). If air is allowed to leak into an oxygen-limiting silo, forage quality can decline, and the chance of a fire developing increases. Many fires have started in oxygen-limiting silos that have been unused for several years but not emptied.

For the unloader system, examine belts, bearings, wiring, and the motor. Lubricate the lift cables, and immediately replace any lift cable showing signs of kinks, cuts, or corrosion. Check for damaged insulation or terminals on the unloader power cable, and repair or replace damaged materials as needed.

Harvesting and Storage Recommendations

Implementing the following steps for harvesting and storing forages will decrease the risk of a silo fire occurring:

  1. Minimize drying time to reduce respiration.
  2. Chop forage at the correct theoretical length cut (TLC). The TLC for hay crop silage is 3/8 inch; the TLC for corn silage is 1/4 inch. Follow the silo manufacturer’s recommendations.
  3. Ensile at 30%–50% dry matter content (i.e., 50%–70% moisture content), based on the silo manufacturer’s recommendations. Using this approach will optimize fermentation.
  4. Leave the silo sealed for at least 14 days to allow complete fermentation to occur.
  5. Unload 2–6 inches per day, and maintain a smooth surface. Using this unloading schedule will help you stay ahead of any spoilage. Spoilage is caused by the bacterial action that can cause heating.
  6. Discard deteriorated silage. Performing this step will help eliminate a fuel source for potential fires and minimize animal health problems.

Management of Silo Fires

Managing silo fires involves monitoring silage to detect a fire early, taking the proper steps when you suspect or discover that a fire is burning, and understanding how fires in different types of silos are extinguished.

Monitoring of Silage

Silage is costly to replace, so one of the main goals of managing a silo fire is to locate the fire and control the area so that only a minimum amount of silage is affected. The first step in managing a silo fire is early detection, so monitor a silo for three weeks postharvest. This length of time is the critical period for fermentation and heating to occur. Because silage burns slowly, detecting a fire early allows you time to evaluate your options and develop a plan for addressing the fire.

Response to the Presence of a Fire

If you suspect or discover a silo fire, contact your local fire department immediately. A silo is a confined space, and firefighters are obligated to follow the US Department of Labor, Occupational Safety and Health Administration (OSHA) Confined Space Standard for entry into a silo. When you contact the fire department, indicate the type of fire so that the fire department can dispatch the correct personnel and equipment (e.g., thermal imaging camera, infrared heat gun, self-contained breathing apparatus).

Wait for the fire service personnel to arrive. Do not enter the silo or climb the chute because unknown factors, such as fire gases or burning embers falling down the chute, may exist. Only rescue personnel with self-contained breathing apparatuses or supplied-air respirators should enter an upright silo because of toxic gases that can be present due to the fermentation process or the fire. The most typical gases in silos include carbon monoxide, carbon dioxide, nitric oxide, nitrogen dioxide, and nitrogen tetroxide. Additional gases can be present due to the burning of substances such as silo liners and epoxy coatings.

While waiting for fire service personnel to arrive on the scene, take the following steps:

  1. Close the bottom of the chute to reduce airflow that may be fanning the fire. Use sheet metal or another noncombustible material to close the chute.
  2. Remove all livestock from any exposed or adjacent buildings.
  3. Spray water to wet down the area around the silo chute to prevent the fire from spreading.
  4. Place noncombustible shields (metal siding, etc.) over any openings in the silo or chute to prevent sparks and embers from flying into or onto other buildings.

Fire Management Approaches for Various Silo Types

It is important to understand how silo fires are managed in various silo types. A fire in a conventional silo will not burn out; instead, it must be extinguished. A fire in oxygen-limiting silo may be managed so that it burns out, or it may have to be extinguished. To extinguish a silo fire, it is necessary to eliminate one of the ingredients needed for fire to occur. Trained fire service personnel are needed to extinguish a fire in any type of silo.

Conventional Silo

Because a conventional silo is not airtight, fire service personnel cannot smother the fire by eliminating the air source. The best approach is to locate the heat source and remove it. If possible, fire service personnel should avoid flooding the silo with water for the following reasons: doing so could ruin good feed; it is difficult to unload wet silage with an unloader; water can damage the silo; and the introduction of water can actually cause additional fires in the silo.

Oxygen-Limiting Silo

With proper management, you may be able to allow a fire in an oxygen-limiting silo to burn out. To reduce any additional air from entering the silo, close the top hatch cover (without latching it) and the bottom unloading door. CAUTION If the silo is heavily smoking or rumbling (vibrating), do not attempt to close the top hatch; rather stay off the silo! The assumption is that after you close the top hatch cover and bottom unloading door, no air will go into the silo, so the fire eventually will use up the residual air in the silo and burn out over time. However, this process can take up to three weeks. If this approach does not work, trained personnel—usually representatives of the silo manufacturer/dealer—can inject carbon dioxide or liquid nitrogen into the silo, causing any oxygen trapped by the silage to be consumed and allowing the fire to burn out.

A concern related to a fire in an oxygen-limiting silo is the potential buildup of confined gases within the silo. Through pyrolysis, a smoldering fire will produce large quantities of carbon monoxide and other products that can result in an explosion when combined with air from outside the silo. Consequently, you should do nothing that will cause air to go into the silo. For example, do not add water or foam or open any portals into the silo.

Modified Oxygen-Limiting Silo

For fire management purposes, you can treat an oxygen-limiting silo that has been modified through the installation of a top unloader the same way as a nonmodified oxygen-limiting silo, at least initially. However, in spite of such modification, these structures are still airtight enough to allow for a dangerous buildup of carbon monoxide in a smoldering fire. In more than one case, an explosion has occurred during firefighting operations involving a modified oxygen-limiting silo.

Additional Recommendations

  • Specialized training in proper techniques for responding to silo fires is available for fire department personnel. If your local firefighters have not had such training, encourage them to locate and participate in a training program.
  • If you no longer use a silo, make sure that it is completely empty. Residual silo material can dry out and pose a fire risk.
  • In the event of a silo fire, do not apply cool or cold water to the outside of a silo because doing so may cause structural damage.
  • After a silo fire, inspect the silo, and make any necessary repairs.

Resources

Click here for a guide to assisting firefighters at the scene of a silo fire. 

 
Use the following format to cite this article:
Silo fire prevention and management. (2015) Farm and Ranch eXtension in Safety and Health (FReSH) Community of Practice. Retrieved from http://articles.extension.org/pages/70637/silo-fire-prevention-and-manag….
 

Sources

Florida Forage Handbook. (2008). University of Florida Institute of Food and Agricultural Sciences (IFAS). Retrieved from http://edis.ifas.ufl.edu/pdffiles/ag/ag36200.pdf.

Hill, D. (2009) Silo fires—protect your investment. Pennsylvania State University. Retrieved from http://www.farmemergencies.psu.edu/SiloFires-ProtectYourInvestment2.pdf.

Murphy, D., and Arble, W. (2000) Extinguishing fires in silos and hay mows. New York: Natural Resource, Agriculture, and Engineering Service.
 
Article Contributor: 
Davis E. Hill, Pennsylvania State University–deh27@psu.edu
 
Reviewed and Summarized by:
Linda M. Fetzer, Pennsylvania State University-lmf8@psu.edu
Carol Jones, Oklahoma State University–jcarol@okstate.edu
Dennis J. Murphy, Pennsylvania State University–djm13@psu.edu
Aaron M. Yoder, University of Nebraska Medical Center–aaron.yoder@unmc.edu


Horizontal Silo Safety

Bunk Silo

Bunk Silo

(Source: Penn State Ag Safety and Health)


Use the following format to cite this article:

Horizontal silo safety. (2013). Farm and Ranch eXtension in Safety and Health (FReSH) Community of Practice. Retrieved from http://www.extension.org/pages/68328/horizontal-silo-safety.


The term horizontal silo refers to a storage system in which silage is piled in low, long piles in a space that may or may not have sidewalls. Horizontal silos vary in size depending on the scale of the farm operation. There are several common types of horizontal silos: 

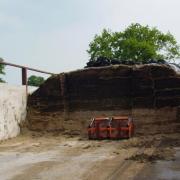
  • A bunker silo (shown above) is a horizontal silo with construction-grade materials for sides.
  • A trench silo is cut into the earth. 
  • Drive-over piles are piles of silage that are dumped on the ground or a hard surface without walls.

Silo Inspection

All types of horizontal silos can have damage from wear and tear, so it is important to inspect bunker silos for cracks in the sidewalls before harvesting silage. Sidewall cracks should be repaired immediately to maintain the integrity of the wall. Sidewalls in a trench silo can slip and the floors in trench silos and drive-over piles can become muddy or rutted.

Sighting rails (shown below) made of iron or steel pipe should be installed and maintained on bunker silos to provide visual clues for the operator as he or she backs up and unloads and packs forages. Note that these railings will not prevent a tractor or truck from overturning, but they can serve as fall protection for workers placing plastic and weights on the packed silage.


Sight Rails on Bunk Silo

Sight Rails on Bunk Silo. Photo Source: Keith Bolsen, Kansas State University


Packing Safety

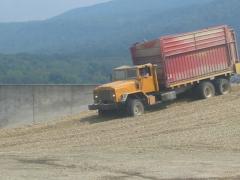
Silage should be packed tightly, and packing of silage should be completed quickly. Packing in this manner helps to exclude oxygen from the silage, which in turn promotes effective fermentation. In the rush to complete the packing process, especially when multiple trucks and tractors are used, the prevention of rollover incidents is a primary safety concern. To reduce the risk of a rollover incident, packers should use a safe slope or progression wedge (shown below) with a maximum slope of 3:1 (3 ft. of horizontal run to 1 ft. of vertical drop). The slope should be maintained on all sides of drive-over piles. Tractors used for packing silage should be equipped with rollover protective structures (ROPS), and operators should always wear seat belts.


Exiting Progressive Wedge Trench

(Source: Pennsylvania State University, Agricultural Safety and Health)

Some farm operations utilize dump trucks to haul forage to the silo. Like tractors, dump trucks can also overturn, so operators should always wear their seat belts and should keep the truck’s center of gravity between the frame rails of the truck. When the dump bed is raised, the truck becomes less stable, especially on uneven or sloped terrains. The following hazards can cause dump trucks to roll over:

  • Tire ruts
  • Depressions
  • Wind gusts
  • Uneven loads 
  • Low tire pressure on one side of the truck

Operating dump trucks and packing equipment away from the sidewall will help prevent damage to the sidewalls of a horizontal silo and will help reduce the risk of overturn incidents.

Once the packing process is completed, the silage should be covered with plastic and weights, requiring workers to stand or walk on the sidewalls of a bunker silo. Fall protection is necessary to reduce injury risk to workers completing this task. Fall-protection standards require that anytime workers are on a walking or working surface with unprotected sides that are 6 ft. or more above a lower level, the workers should be protected through the use of guardrails or other fall-protection systems. Sighting rails on the sides of a bunker silo can be considered guardrails if their construction meets standard handrail specifications. Click here for the specific fall-protection standard outlined by the U.S. Department of Labor, Occupational Safety and Health Administration (OSHA).

Safety Precautions during Feedout

There are several potential causes of injury during the feedout process, including the following:

  • Equipment rollover
  • Entanglement
  • Silage collapse due to undercutting

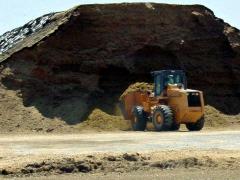
Undercutting occurs when silage-loading machines (for example, tractor front-end loaders, skid steers, and so on) are not able to reach the top of the silage face. Silage in horizontal silos can be packed to heights of 20 to 40 ft., and most pieces of equipment on traditional farm operations are too small to reach the top of the silage. If a machine is not able to reach the top of the silage and instead continually removes silage from the bottom, the process creates an overhang (shown below) that could potentially collapse and bury workers, bystanders, and equipment beneath tons of silage.

Undercut Silage Face


(Source: Keith Bolsen, Kansas State University)

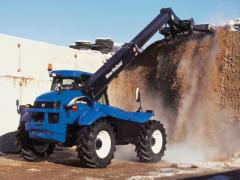
One way to reduce undercutting is through the use of a silage defacer. A silage defacer has a hydraulic set of rotating knives mounted in an open framework. The defacer is mounted to a skid steer or material handler’s boom (shown below). The purpose of the defacer is to loosen silage vertically from the top to the bottom of the silage face in the horizontal silo, eliminating the undercutting that causes an overhang hazard.

NH Telehandler

(Source:New Holland North America)

Operators using a silage defacer must read the operator’s manual prior to using the equipment to understand how to operate the equipment safely. Anyone operating the silage defacer should first clear the work area of all bystanders. The defacer should be operated only from the operator’s station. The defacer should be positioned at the top of the silage feedout area before the motor is engaged. Once the motor has reached full speed, the unit should be slowly lowered to cut through the recommended depth (that is, 1 to 3 in. per pass). As with all equipment, the operator should not leave the operator’s station until the unit has been shut down, parts have stopped moving, and the keys have been removed from the ignition switch.

It is recommended that no one stand at a silage face that exceeds his or her height. Silage faces can collapse even if an overhang hazard is not present (for example, when a frozen chunk of silage breaks loose). This type of hazard is especially dangerous for individuals, such as nutritionists or students, collecting silage samples. To reduce the risk of a silage-face collapse, those collecting samples should use a loader to scoop up silage and move it away from the silage face before gathering samples from the loader bucket.

Regulations Regarding Hired Labor

Any agricultural operation employing 11 or more workers should adhere to the following standards under OSHA:

  • Rollover Protective Structures (ROPS) for Tractors Used in Agricultural Operations (1928.51): The ROPS standard requires that employees use only tractors equipped with a ROPS and seatbelt.
  • Guarding of Farm Field Equipment, Farmstead Equipment, and Cotton Gins (1928.57): This standard requires that power take-off (PTO) shafts and other moving parts of machinery and equipment be equipped with proper guarding.

The U.S. Department of Labor governs regulations regarding youth employed in agricultural operations. Youth aged 14 and 15 can be employed on farms and ranches, but they must complete a course and receive a certificate of training under the regulations of the Agricultural Hazardous Occupations Order (AgHOs) before operating tractors or powered farm equipment. AgHOs regulations do not apply to youth age 16 or older or to youth working on their own family farms. Safety training is important for all agricultural workers, but it is especially important for youth working on any farm.

Producers who hire custom operators should ensure that the operators are familiar with the farm or ranch’s fields, roads, lanes, and silage storage facilities. It is the responsibility of the farm owner or producer to provide a safe workplace for contractors and warn them of any hazards that cannot be eliminated. All custom operators that have employees should have proof of workers’ compensation and insurance coverage and should provide their workers with safety training.

Additional Safety Recommendations

Producers and workers should adhere to the following safety recommendations when working around horizontal silos: 

  • Allow only mature, experienced individuals to operate equipment.
  • Use tractors that have a low clearance and wide front end.
  • Use tractor weights to improve stability.
  • When packing on sloped surfaces, move by backing the tractor up the slope.
  • When packing, use a tractor equipped with front-wheel drive or front-wheel-assist drive for additional traction and stability.
  • When using a dump truck on the forage slope, back the truck up the slope to reduce the risk of a side overturn.
  • Do not fill a bunker or trench silo higher than the sidewalls.
  • Know where workers are located and use standard agricultural hand signals to communicate.
 

Use the following format to cite this article:

Horizontal silo safety. (2013). Farm and Ranch eXtension in Safety and Health (FReSH) Community of Practice. Retrieved from http://www.extension.org/pages/68328/horizontal-silo-safety.


Sources

Harshman, W., Yoder, A., Hilton, J., and Murphy D. (2013) HOSTA Task Sheet 3.9.2: Packing forage in a horizontal silo. The Pennsylvania State University. Hazardous Occupations Safety Training in Agriculture. Retrieved from http://www.extension.org/sites/default/files/NSTMOP%20Task%20Sheets%20Se….

Harshman, W., Yoder, A., Hilton, J., and Murphy D. (2013) HOSTA Task Sheet 6.9: Silage defacers. Retrieved from http://www.extension.org/sites/default/files/NSTMOP%20Task%20Sheets%20Se….

Murphy, D. and Harshman, W. (2007) Horizontal silo safety. The Pennsylvania State University College of Agricultural Sciences. Retrieved from https://extension.psu.edu/horizontal-silo-safety.


Reviewed and Summarized by:

Linda M. Fetzer, Pennsylvania State University – lmf8@psu.edu
LaMar Grafft, East Carolina University grafftl@ecu.edu
Gail Lapierre, University of Vermont  gail.lapierre@uvm.edu
Dennis J. Murphy, Pennsylvania State University (Has since retired) 
Aaron M. Yoder, University of Nebraska Medical Center – aaron.yoder@unmc.edu


Crop and Feed Safety Publications


Topic Titles Organization Pub Date
Control and Prevention of Hay Fires Kansas State University 2008
Corn Production Safety and Health for Farmers University of Georgia Cooperative Extension 2012
Farm Security – “Treat It Seriously” – Security for Plant Agriculture: On-Farm Assessment and Security Practices Virginia Cooperative Extension 2011
Farm Security – “Treat It Seriously” – Security for Plant Agriculture: Producer Response for Plant Diseases, Chemical Contamination, and Unauthorized Activity Virginia Cooperative Extension 2011
Guarding Against Corn Harvesting Accidents Pennsylvania State University 2014
Harvest Safety University of Maine Extension 2002
Harvesting Crops by Hand Safely University of Maine Extension 2002
Harvesting Hay Safely University of Maine Extension 2002
Hay Fire Prevention and Control Virginia Cooperative Extension 2009
Horizontal Silo Safety Pennsylvania State University 2007
Large Round Bale Safety Virginia Cooperative Extension 2009
Large Round Bale Safety Kansas State University 2008
Managing Moldy Grain Purdue Extension 2010
Safe Forage Harvesting Pennsylvania State University 2014
Safely Making and Handling Large Package Hay Bales Pennsylvania State University 2013


Crop and Feed Safety Video Resources


Topic Titles Organization Resource Type
Farm Safety – Crop Protection Products (2011)
2:51 minutes
Canadian Agricultural Safety Association Free – Online Video via YouTube
Feeder Safety (Dairy Safety Training Part II, Section 3)
2013
6:59 minutes
U.S. Agricultural Safety and Health Centers Free – Online Video via YouTube
(2013)
3:46 minutes
U.S. Agricultural Safety and Health Centers Free – Online Video via YouTube

Preventing Silage-Related Injuries and Fatalities Among Farm Workers

(2017)

6:30 minutes

Virginia Tech Free – Online Video via YouTube
Silage Safety
(2015)
17:18 minutes

Dr. Keith Bolsen

Kansas State University

Free DVD – Contact Dr. Bolsen at keithbolsen@hotmail.com
24:10 minutes
Farm Employers Labor Services Available for purchase – $98/DVD


Preventing Fires in Baled Hay and Straw


Use the following format to cite this article:

Preventing fires in baled hay and straw. (2012). Farm and Ranch eXtension in Safety and Health (FReSH) Community of Practice. Retrieved from http://www.extension.org/pages/66577/preventing-fires-in-baled-hay-and-straw.


Most hay fires occur within the first six weeks after baling. Understanding the causes of fires in stored hay and learning how to reduce fire hazards will protect your feed supply and could prevent the loss of time and money associated with a fire. 

Causes of Fires in Baled Hay or Straw

Moisture content is the main factor that causes hay and straw to spontaneously combust. Hay fires are more common than straw fires, for reasons involving the type of forage, the moisture content in the stored forage, and heat production.

After forages are cut, respiration of plant fibers (burning of plant sugars to produce energy) continues in plant cells, causing the release of a small amount of heat. When the forages are cut, field dried, and baled at the recommended moisture level (20% or less), plant cell respiration slows and eventually ends. 

When forages are baled at moisture levels of greater than 20%, the right environment is provided for the growth and multiplication of mesophilic (warm temperature) bacteria found in forage crops. Mesophilic bacteria release heat within the bale and cause the internal bale temperature to rise between 130ºF and 140ºF. At this temperature range, bacteria die and bale temperature decreases. Fire risk is greater for hay than for straw because a hay bale’s interior temperature does not cool after the first initial heating cycle. The respiratory heat created by the mesophilic bacteria provides a breeding ground for thermophilc (heat loving) bacteria. Basically, the higher the moisture content, the longer a bale will remain at a higher temperature. For example, a bale with 30% moisture content may have higher interior bale temperature for up to 40 days. When thermophilic bacteria are present, they multiply and produce heat, which can raise interior bale temperature to over 170°F. At these temperatures, spontaneous combustion can occur.

Additional factors that contribute to the risk of hay fires include the volume of the mow or bale stack, bale density, and ventilation or air flow around the stacked bales. Bales with a lower density that are stacked lower and have good air flow and ventilation have a lower risk of overheating.

Decreasing the Risk of Fire

The best way to reduce the risk of a hay fire is to bale hay at a moisture content of 20% or less because at this moisture level, microbial activity decreases. There are several ways of reducing moisture content in baled hay:

  • Baling under appropriate conditions: Weather plays a critical role in achieving the appropriate moisture level in baled hay. The recommended weather conditions for haymaking are a slight wind and a humidity level of 50% or less. Because hay has a higher moisture content in the morning, it is recommended that you bale later in the day. The recommended practice for haymaking is to mow hay in the morning and allow it to dry in the field for a minimum of one full day prior to baling.
  • Using specialized equipment: Another way of decreasing moisture content is to use specialized haying equipment designed to increase drying rates. Such equipment includes tedders, windrow inverters, hay rakes, and conditioning equipment.
  • Using hay preservatives: Hay preservatives, such as liquid propionic acid, applied to the hay during baling inhibit or reduce the growth of bacteria in hay with a high moisture content. 

Another way to reduce the risk of a hay fire is to ensure that stored hay remains dry. 

  • When storing hay inside, make sure the barn or storage area is weathertight and has proper drainage to prevent water from entering the barn. 
  • When storing hay outside, cover the hay with plastic or another type of waterproof material. If you are unable to cover the bales, arrange the bales so that air can circulate between them to promote drying. Bales can be protected from ground moisture by storing them on a bed of gravel or lifting them off the ground on used tires, poles, or pallets.

Monitoring the Temperature of Stored Hay

If you are concerned that hay may have been baled at too high a moisture content, monitor the internal bale temperature twice daily for the first six weeks after baling. For safety reasons, you must work with a partner when checking the temperature of stacked bales. One of you stands atop the bales to measure the internal temperature while the other observes. The person testing the hay should wear a harness and a lifeline that is attached to a secure object. In the event of an emergency, such a system allows the observer to pull the person checking the temperature out of the hay. Due to the potential dangers of this situation, this task should not be assigned to youth workers.

You can use a commercial thermometer to test the temperature of baled hay, but commercial thermometers are not always the appropriate length to monitor the interior zone of baled hay. If a commercial thermometer does not meet your needs, you can fabricate a probe from a 10 ft. length of 3/4 in. iron pipe. Drill eight holes that are 3/16 in. in diameter about 3 in. from one end. Hammer that end of the pipe to form a sharp edge with which to probe. Insert the probe into a hay bale, and use a piece of light wire to lower a thermometer down into the end of the pipe. Alternatively, you may use a piece of 3/8 in. pipe that is 8 to 10 ft. long to test the temperature of hay.

To test the temperature of the hay, place wooden planks or plywood across top of the bales so that the weight of the person standing on the hay is distributed evenly and he or she will be at less risk of falling into a burned-out cavity. Drive a commercial thermometer or a homemade probe into the bale of hay. If you use a fabricated probe, keep the thermometer in the probe for approximately 10 to 15 minutes to obtain the temperature reading. If you use a 3/8 in. pipe, leave the pipe in place for 20 minutes. When you remove the pipe from the hay, if the pipe is too hot to hold in your hand, then you should remove the hot hay.

The following temperature chart outlines further actions that may need to be taken depending on the temperature of the hay.

Critical Temperatures and Action Steps
Temperature (ºF) Condition and Action
125 No action needed.
150 Hay is entering the danger zone. Check temperature twice daily. Disassemble stacked hay bales to promote air circulation to cool the hay.

160

Hay has reached the danger zone. Check hay temperature every couple of hours. Disassemble stacked hay bales to promote air circulation to cool the hay.
175 Hot spots or fire pockets are likely. Alert fire services to the possible hay fire incident. Stop all air movement around the hay.
190 With the assistance of the fire service, remove hot hay. Be aware that hay could burst into flames.
200 or higher With the assistance of the fire service, remove hot hay. Most likely, a fire will occur. Be aware that hay could burst into flames.

(Source: National Resource, Agriculture, and Engineering Service [NRAES])

Hay Fire Hazards

The following three hazards exist from hay fires: 

  • Flare-Ups: When the internal hay bale temperature is between 150ºF and 170ºF, the potential exists for spontaneous combustion, and the hay should be moved to allow it to cool. If the temperature is at the higher end of the range, moving the hay could expose it to oxygen and cause flare-ups. Contact your local fire department and have charged water hoses available. 
  • Burned-Out Cavities: These cavities form when temperatures deep within stored hay reached high temperature levels and the hay has burned. A person can become trapped in a burned-out cavity if he or she is walking over the top of the hay pile. Due to the risk of a person falling into a burned-out cavity, at least two people should investigate a hay mow.
  • Toxic Gas: Toxic gases such as carbon monoxide can be released by smoldering and burning hay. Chemically treated hay may emit additional toxic gas vapors. A trained fire-rescue worker with a self-contained breathing apparatus (SCBA) should be called to assist at the scene in either situation.

When a Fire Occurs

In the event of a fire, or even when hay is smoldering, contact the fire department immediately. Your next action step and main priority should be to protect human life. Remember that you can replace hay, buildings, and equipment, but you cannot replace human life.

Before taking any action to fight a fire, consider other valuable actions you can take to address the situation prior to the arrival of fire fighters, including the following:

  • Account for all personnel on your farm or ranch operation.
  • Check the area for flammable products. If any are present, immediately leave the area and upon the fire fighters’ arrival, make them aware of the flammable products.
  • Determine whether electricity needs to be turned off in buildings.
  • If the hay fire is located inside a building that houses livestock, consider personal safety before relocating livestock to an area away from the structure.
  • Remove any extra vehicles or machinery from the area around the fire to clear space for the fire service equipment.
  • Stage bale-moving machinery out of the immediate fire area, but have it available to help move bales, as directed by fire fighters.
  • Retrieve material safety data sheets (MSDSs) for any chemical preservatives that may have been used on the hay and that fire fighters will need to review.

Moving hay bales is hot, smoky, and physically demanding work that can cause injuries, exhaustion, smoke inhalation, and heart attacks. Individuals involved at the scene need to be monitored and should receive medical attention should they exhibit signs related to any of these health concerns.

Things to Remember:

  • Most hay fires related to moisture levels occur in the first six weeks after baling.
  • When baling hay, keep moisture levels at 20% or less.
  • Keep baled hay dry by covering it or storing it inside.
  • Monitor internal bale temperature on a regular basis.
    • Youth workers should not be given the task of checking hay temperatures.
  • If you store uncovered bales outside, arrange bales so that air can circulate around them.
  • The use of ventilation changes based on the temperature of the hay. At lower temperatures, increased ventilation around the bales will help the hay return to an acceptable temperature. If hay temperatures reach 175ºF, stop ventilating hay because the increased air flow could feed a fire.
  • Maintain MSDSs for any crop preservatives that may have been used on the hay, and have the MSDS readily available for fire service personnel.


Use the following format to cite this article:

Preventing fires in baled hay and straw. (2012). Farm and Ranch eXtension in Safety and Health (FReSH) Community of Practice. Retrieved from http://www.extension.org/pages/66577/preventing-fires-in-baled-hay-and-straw.


Sources


Gay, S., Grisso, R., Smith, R., & Swisher, J. (2003) Hay fire prevention and control. Virginia Cooperative Extension. Retrieved from https://www.uky.edu/Ag/Forage/Hay%20Fire%20Prevention%20and%20Control%20….

Harshman, W., Yoder, A., Hilton, J., & Murphy, D. (2011) Hay storage fires. Hazardous Occupations Safety Training in Agriculture 3.7.2. Retrieved from http://www.extension.org/sites/default/files/NSTMOP%20Task%20Sheets%20Se….

Lemus, R. (2009) Hay storage: Dry matter losses and qualify changes. Mississippi State University Extension Service. Retrieved from http://msucares.com/pubs/publications/p2540.pdf.

Murphy, D. & Arble, W. (2000) Extinguishing fires in silos and hay mows. New York: Natural Resource, Agriculture, and Engineering Service (NRAES).


Reviewers, Contributors, and Summarized by:
Linda M. Fetzer, Pennsylvania State University – lmf8@psu.edu
LaMar J. Grafft, East Carolina University grafftl@ecu.edu
Dave E. Hill, Pennsylvania State University  (Has since retired)
Dennis M. Murphy, Pennsylvania State University – (Has since retired)
Cheryl Skjolaas, University of Wisconsin  skjolaas@wisc.edu
Aaron M. Yoder, University of Nebraska Medical Center – aaron.yoder@unmc.edu


Dangers of Silo Gases


Use the following format to cite this article:

Dangers of silo gases. (2012) Farm and Ranch eXtension in Safety and Health (FReSH) Community of Practice. Retrieved from http://articles.extension.org/pages/64390/dangers-of-silo-gases.


After harvested forages are placed in a silo, they often produce gases during the early stages of the fermentation process. Silo gases are difficult to detect because they are almost invisible, but signs of such gases may include:

  • the formation of a faint yellow or red haze that appears from the top of a conventional silo to the bottom of the ladder chute, 
  • staining on the silo and silage, and
  • a bleach-like odor that may be present even at the base of the silo and in the milking parlor.

If you detect silo gases, leave the area immediately. Physical reactions to silo gases may not be noticeable immediately after your exposure, but damage to your lungs may have already occurred. (Click here to learn more about respiratory illnesses related to farming practices in production agriculture.)

The most common silo gases are carbon dioxide (CO2and nitrogen dioxide (NO2). Types and concentrations of silo gas vary depending on whether the silo is a conventional silo or oxygen-limiting silo and how much time has passed since the silage was placed in the silo.

Conventional Silos

Conventional Silo

Conventional Silo

(Source: Pennsylvania State University. Agricultural Safety and Health)

Conventional silos are often constructed of concrete staves held together with steel hoops, but some are made of reinforced concrete, steel, galvanized tile, or brick.

The most abundant type of gas in a conventional silo is nitrogen dioxide, which has a bleach-like odor and produces low-lying yellow, red, or dark brown fumes. Because it is heavier than air, nitrogen dioxide settles on top of the silage or flows down the chute and collects in adjoining feed rooms or other low-lying areas in the barn near the base of the silo.

Nitrogen dioxide begins to form within hours after the forages are ensiled, with the amount of gas peaking about three days after harvest. From that point, the amount of gas begins to decrease rapidly.

Nitrogen dioxide is harmful because it causes severe irritation to the nose and throat, which can lead to lung inflammation. After low-level exposure to nitrogen dioxide, a person may experience very little immediate pain or discomfort but may later suffer from fluid collection in the lungs that may be fatal. Prolonged or recurring pneumonia-like symptoms can occur two to six weeks after initial exposure. Any person who has been exposed to any level of nitrogen dioxide, for even a short period of time, should seek immediate medical attention.

Oxygen-Limiting Silos

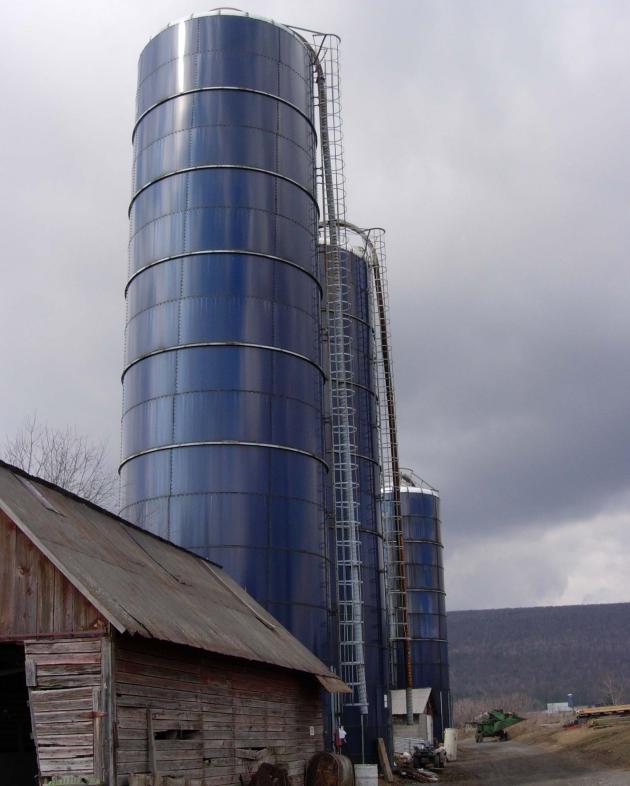
Silos

(Source: Pennsylvania State University. Agricultural Safety and Health)

An oxygen-limiting silo is constructed of dark blue or green enamel-coated steel, poured reinforced concrete, or concrete staves. Oxygen-limiting silos are designed so that entering the silo is typically unnecessary. 

In this type of silo, the fermentation process produces both nitrogen dioxide and carbon dioxide. The conditions in an oxygen-limiting silo promote greater production of carbon dioxide, which helps maintain high-quality silage.

Carbon dioxide is an odorless and colorless gas that displaces the life-sustaining oxygen in a silo. When levels of carbon dioxide are high, a person may have little warning before being overcome by this gas. 

Modified Oxygen-Limiting Silo

A modified oxygen-limiting silo is an oxygen-limiting silo that has been modified with a different type of unloading system. The unloading system is located on the top of the silage and unloads through a hollow center chute. An oxygen-limiting silo can also be modified with the addition of a conventional top-unloading system, unloading doors, and a chute along the outside of the silo tower. Silos with a top-unloading system typically have a domed roof to provide space for the tripod that suspends the unloader.

As in an unmodified oxygen-limiting silo, the respiration and fermentation process converts the oxygen in the silo into carbon dioxide. The design of a modified oxygen-limiting silo typically makes entry unnecessary.  

Decreasing the Risk of Exposure to Silo Gases in Conventional Silos

  • Ventilation: When you use a conventional silo on your farm or ranch, ventilation is the best defense against nitrogen dioxide buildup in areas of your barn and the best away to lower the risk to your livestock.

    • Provide adequate ventilation in and around your silo during the first 72 hours of silage fermentation and for at least two to three weeks after filling the silo.
    • Keep the door between the silo room and the barn closed.
    • Consider using barn exhaust fans to blow air into the silo or feed room to decrease quantities of silo gases that may have flowed down the chute.
  • Timing: Avoid the silo during critical periods when silo gases are forming. Gas concentrations are highest between 12 and 72 hours after filling.

    • If at all possible, do not enter the silo for two to three weeks after filling because of the high level of silo gases. If you must enter the silo during that time to level silage or set up an unloader, enter immediately after the last load is in and before the fermentation process begins—a period that may be only a few hours. (Follow the same precautions below if entry is required within four to six weeks after filling.)
      • Prior to entry, run the silo blower for 15 to 45 minutes and keep it running while you are in the silo.
      • Wear a self-contained breathing apparatus (SCBA) and a harness attached to a lifeline and anchor point.
      • Always maintain visual contact with a second person outside the silo.
      • If the level of the silage is low, a silo blower will not provide enough ventilation to dilute the silo gases. Do not enter the silo without wearing an SCBA.
    • Prior to entering any silo at any time, make sure that the power supply for all unloading mechanisms is locked out.
  • Personnel: Never enter a silo unless there is another person present outside the silo who can quickly get help if necessary. This person should maintain visual contact with you at all times because if you are overcome by silo gas, you may not be able to call out for assistance.
  • Personal Protective Equipment (PPE): If, in an emergency, it is necessary to enter a silo containing silage, the individual entering the silo must wear an SCBA. Click here to learn more about respiratory protection equipment. 
  • Signage: Post appropriate signage warning people of the potential for silo gases. By posting “Danger—Deadly Silo Gas” signs around the base of the silo, you are warning visitors, family members, and workers to stay away from the area.

Additional Recommendations

  • Keep children away from the silo and adjoining areas during filling and for at least two weeks after.
  • When uncovering the filler opening, stay positioned on the ground and use a rope to pull the cover off the filler opening. Remove the cover several days before you start using the silage.
  • If you begin to cough or experience throat irritation while working near a silo, move to a source of fresh air immediately.
 

Use the following format to cite this article:

Dangers of silo gases. (2012) Farm and Ranch eXtension in Safety and Health (FReSH) Community of Practice. Retrieved from http://articles.extension.org/pages/64390/dangers-of-silo-gases.


Sources


Atia, A. (2004) Silo gas (NO2) safety. Agri-Facts. Retrieved from http://www1.agric.gov.ab.ca/$department/deptdocs.nsf/all/agdex9036/$file/726-1.pdf?OpenElement.

Cyr, D. and Johnson, S. (2002) Upright silo safety. University of Maine Cooperative Extension. Retrieved from http://umaine.edu/publications/2305e/.

McFadden, M. (2011) Beware of silo gases. Michigan State University Extension. Retrieved from http://news.msue.msu.edu/news/article/beware_of_silo_gas.

Murphy, D. (2013) Silo gases—the hidden danger. Pennsylvania State University Cooperative Extension. Retrieved from https://extension.psu.edu/silo-gases-the-hidden-danger. .

Murphy, D. and Arble, W. (2000) Extinguishing fires in silos and hay mows. New York: Natural Resource, Agriculture, and Engineering Service.
 

Reviewed and summarized by
Linda M. Fetzer, Pennsylvania State University – lmf8@psu.edu
Dave Hill, Pennsylvania State University (Has since retired)
Dennis J. Murphy, Pennsylvania State University (Has since retired)
J. Samuel Steel, Pennsylvania State University (Has since retired)
Aaron M. Yoder, University of Nebraska Medical Center – aaron.yoder@unmc.edu


Safety Recommendations When Baling and Handling Round Bales

Round Bale in Field

(Source: Pennsylvania State University. Agricultural Safety and Health)


Use the following format to cite this article:

Safety Recommendations When Baling and Handling Round Bales. (2012) Farm and Ranch eXtension in Safety and Health (FReSH) Community of Practice. Retrieved from http://www.extension.org/pages/64301/safety-recommendations-when-baling-and-handling-round-bales.


When baling and handling large round bales, you must recognize and understand potential hazards and follow the manufacturer’s operating recommendations for each piece of equipment you use.

Using a Round Baler

The round baler is a complex machine with multiple moving parts, and an entanglement incident could lead to costly repair bills, injury, or death. Prior to using the baler each season, you must:

  • thoroughly inspect it,
  • make any needed repairs, and 
  • review all of the safety precautions in the owner’s manual.

The size and rated power of the tractor you use with your baler must meet the manufacturer’s requirements for towing and powering the baler.

Safety Recommendations

  • Make sure that safety locks are in place when working on the baler while the bale chamber is open.
  • When operating the baler, do not leave the tractor seat until the power take-off (PTO) is disengaged and all moving parts have stopped.
  • Ensure that all the original shields are in place on the power shafts and other moving parts of both the tractor and baler.
  • Because balers produce flammable dust and are susceptible to overheating due to friction, equip your tractor with a 10-pound dry chemical (ABC) fire extinguisher.
  • Eject the bales at an angle perpendicular to the slope to reduce the risk of a bale rolling down the incline.
  • When baling on uneven or hilly terrain, travel slowly and avoid holes and drop-offs. A round baler has a high center of gravity and could tip sideways if a wheel goes into a ditch or hole.
  • Avoid sharp turns with a baler because the tractor wheels might hit the tongue of the baler. 
  • Refer to the owner’s manual of the baler for additional safety information related to the machine you are using.

Handling Bales

Many producers move bales in the field with front-end loaders. The recommended practice for moving bales with a front-end loader is to remove the bucket and use an attachment designed to handle round bales, such as a grapple hook or bale spear. Using a grapple hook or spear on your front-end loader reduces the potential for the bale to roll back onto the loader arms or operator. Click here to watch a video by Mississippi State University about the danger of lifting unsecured loads with a front-end loader.

Be certain that both the tractor and the attachment are able to safely handle the weight and size of your round bales. The lifting mechanism used to move the bales should have a working load rating that exceeds the size of the bales.

The center of gravity on a tractor changes when it is carrying a bale. Producers tend to lift the load to increase visibility. This action raises the center of gravity and places the tractor at increased risk for a side overturn. The risk of a side overturn also increases when traction is lost because the tractor is operating on rough terrain or wet ground.

When using a rear-mounted three-point lift to move round bales, do not lift bales too high. The center of gravity could shift to the rear of the tractor and cause the front of the tractor to rise. If the front of the tractor rises too much, the front tires lose stability, and steering is impaired. Hauling bales simultaneously with a front-end loader and rear-mounted attachment can reduce the stability problem, but you must take care not to exceed the weight limit for the loader tractor’s tire capacity. 

Safety Recommendations

  • Avoid overhead wires when you are moving bales with a front-end loader. Keep the bale close to the ground.
  • Use additional weight (within the load capacity of the tires) on the front or rear end of the tractor to ensure stability.
  • Relieve the hydraulic pressure before disconnecting all hydraulic lines. Examine the lines for leaks and malfunctioning parts.
  • When moving bales, use a tractor that is equipped with a rollover protective structure (ROPS), and always buckle the seat belt.

Hauling Bales

Specialized bale wagons and trailers that carry multiple bales at a time can save time and reduce the risk of overturns and of overloading a tractor’s hydraulic system.

Safety Recommendations

  • When using a wagon or trailer to haul bales, choose a tractor that can maneuver and stop a wagon or trailer carrying the weight of the bales.
  • Ensure that the wagon or trailer is properly hitched to the tractor’s drawbar by using a safety pin and a safety chain. 
  • Properly secure the bales on the wagon or trailer by using straps that have a tensile strength of one-and-half times the weight of the load.
  • When transporting round bales on a public roadway, remember to follow all traffic laws related to wide loads. The trailer or wagon should be highly visible and equipped with a slow-moving vehicle (SMV) emblem, reflectors, and warning lights.


Use the following format to cite this article:

Safety Recommendations When Baling and Handling Round Bales. (2012) Farm and Ranch eXtension in Safety and Health (FReSH) Community of Practice. Retrieved from http://www.extension.org/pages/64301/safety-recommendations-when-baling-and-handling-round-bales.

Sources

Grisso, R., Cundiff, J., Stone, B., and Smith, R. (2002) Large round bale safety. Virginia Cooperative Extension. Retrieved from http://www.pubs.ext.vt.edu/442/442-455/442-455_pdf.pdf.

Grisso, R., Fike, J., Ohanehi, D. & Perumpral, J. (2014). Management Tips for Round Bale Hay Harvesting, Moving, and Storage. Virginia Cooperative Extension. Retrieved from http://pubs.ext.vt.edu/442/442-454/442-454.html.


Reviewers, Contributors, and Summarized by:
Willard Downs, University of Missouri  Willard@missouri.edu
Linda M. Fetzer, Pennsylvania State University – lmf8@psu.edu
Dennis J. Murphy, Pennsylvania State University – djm13@psu.edu
Michael Pate, Utah State University  michael.pate@usu.edu
Aaron Yoder, University of Nebraska Medical Center – aaron.yoder@unmc.edu
 

Entrapment Risks due to Flowing Grain


Use the following format to cite this article:

Entrapment risks due to flowing grain. (2021) Ag Safety and Health eXtension Community of Practice. Retrieved from https://ag-safety.extension.org/entrapment-risk-due-to-flowing-grain/.

Farmers and ranchers use bins to dry and store grain and to feed their livestock. For the most part, augers are used to transfer the grain to and from bins. Some machinery and augers now used in production agriculture have increased in size and power, resulting in less time for farmers and ranchers to react in dangerous situations. It is therefore important to understand fully the hazards and risks associated with flowing grain and to follow safety guidelines to avoid a potentially fatal injury incident. There are four main situations that pose entrapment risks when you work with stored grain: flowing grain, grain bridge collapse, grain wall avalanche, and use of a grain vacuum. Each of these situations and its entrapment risks are described below.

Flowing Grain

Grain Bin with Flowing Corn

(Source: Pennsylvania State University. Agricultural Safety and Health)

An auger is used to move grain from the bottom center to the outer edge of a grain bin, and from there into a vehicle or alternative storage area. As the grain flows, it forms a funnel, with the wide mouth of the funnel at the top and a smaller opening at the bottom, as shown in the diagram above. If you are in the bin when the grain is being unloaded, you can quickly become engulfed in grain. Depending on the size of the auger, you can be trapped in grain up to your waist within 10 seconds and completely submerged within 25 seconds. Once you are submerged in grain, it can take over 1,000 lb. of force to free your body.

Grain Bridge Collapse

Farmer on Moldy Corn Bridge

(Source: Pennsylvania State University. Agricultural Safety and Health)

A grain bridge forms when grain in poor condition exists throughout a bin. Cavities or pockets of loose grain can form under the crusted level when the auger begins to unload grain from the bin. Grain bridges are not stable, and if you are standing on top of a grain bridge when it collapses, you can quickly become entrapped in the grain. Once you fall through the grain bridge and are trapped, it may be difficult to locate you because the grain will flow rapidly into the area around you.

The proper way to break up or remove a grain bridge is to use a long pole inserted through an access hole from outside the grain bin.

Grain Wall Avalanche

Farmer in Bin with Corn

(Source: Pennsylvania State University. Agricultural Safety and Health)

Moldy or frozen grain can cling to the side of a grain bin, as shown in the diagram above. A grain avalanche can occur when you are breaking up crusted grain from within a bin and the grain wall is higher than you. The grain wall can collapse, creating an avalanche that can quickly engulf you, causing injury or death.

If you must enter a bin, use a body harness and a safety line that is securely tied off. Work above the vertical grain wall, staying above its highest point.

Use of a Grain Vacuum

Grain vacuums are being used with higher frequency as a means of moving grain rapidly from older bins with smaller unloading augers, bins in remote locations without augers, and bins that have mechanical problems. Powered by a tractor power take-off, electricity, or an external motor, these vacuums have the capacity to move several thousand bushels of grain an hour. Typically, an operator uses the vacuum inside the bin, moving the nozzle in a sweeping motion. During the last few years, several operators have been killed when using the equipment in this manner. If the operator drops or releases the nozzle, it can quickly become buried in grain. As a result, the operator may try to lift the nozzle while the vacuum is running. This can cause the grain to be sucked out from under the operator, burying him or her in seconds.

Below are two videos that demonstrate the use of a grain vacuum. To view a grain vacuum in use within a bin, click on the video below.

To see a grain vacuum transferring grain into a truck, click on the video below.

Suffocation in Grain Bins

Flowing grain is similar to quicksand and can quickly engulf you, resulting in suffocation. When even a small amount of grain has space to move, it quickly fills in that new area. When you are trapped by grain and exhale to breathe, the grain flows into the space created by the movement of your chest, placing pressure on your chest and reducing the space that your lungs have to expand during your next inhalation. Each time you exhale a breath, the space around your chest decreases, eventually causing you to suffocate as you take smaller and smaller breaths (or shallower and shallower). When you are trapped in flowing grain, you can also suffocate from taking grain particles into your lungs, stomach, and throat.

Entrapment in Grain Transport Vehicles

Entrapment incidents can occur in grain transport vehicles that are used to move grain from one location to another. The most common types of grain transport vehicles are gravity wagons and bulk material semitrailers. Entrapment in these vehicles is similar to entrapment in a grain bin: a quicksand effect can occur during the loading or unloading process.

Safety Recommendations

  • Lock all access doors to grain storage structures.
  • Secure grain bin ladders and doors to prevent unauthorized entry, especially by children.
  • Never allow children to play or ride in grain wagons. Most grain entrapment incidents in on-farm transport vehicles involve children.
  • Apply entrapment warning decals to all grain bins, wagons, and grain storage areas, as well as commercial transport vehicles.
  • Never work alone! When working with others during grain unloading, know where each person is located and what he or she is doing.
  • Warn workers, family members, and visitors about the dangers of flowing grain and the risk of entrapment.
  • Establish a nonverbal communication system with others when working around flowing grain because of the excessive equipment noise levels.
  • When possible, use inspection holes and grain bin level markers rather than physically entering a grain bin.
  • Before entering the grain bin, lock out and tag out all power controls to unloading augers and conveyors.
  • If you must enter the grain bin, wear a body harness with a lifeline secured to the outside of the bin, and have at least one other person observing your work activity in the bin.
  • When cleaning a grain bin, always work from top to bottom.

Use the following format to cite this article:

Entrapment risks due to flowing grain. (2021) Ag Safety and Health eXtension Community of Practice. Retrieved from https://ag-safety.extension.org/entrapment-risk-due-to-flowing-grain/.

Sources

LaPrade, J. (2008) Grain bin hazards and safety considerations. Alabama Cooperative Extension System. Retrieved from https://store.aces.edu/(S(wgo00aqtzi1ami55t4ckx255))/ItemDetail.aspx?ProductID=16178&SeriesCode=&CategoryID=144&Keyword=&cn-reloaded=1.

Schwab, C., Hanna, M. & Miller, L. (2004) Handle your grain harvest with care. Iowa State University Extension and Outreach. Retrieved from https://store.extension.iastate.edu/ItemDetail.aspx?ProductID=4614.

Grain bin hazards. (2019). Ohio State University Extension Agricultural Tailgate Safety Training. Retrieved from https://ohioline.osu.edu/factsheet/aex-59155.

Yoder, A., Murphy, D. & Hilton, J. (2003). Hazards of flowing grain. Pennsylvania State University College of Agricultural Sciences Cooperative Extension. Retrieved from https://extension.psu.edu/hazards-of-flowing-grain.

Reviewers, Contributors, and Summarized by:
Linda M. Fetzer, Pennsylvania State University – lmf8@psu.edu
LaMar Grafft, East Carolina University grafftl@ecu.edu
Davis E. Hill, Pennsylvania State University Has since retired
Dennis J. Murphy, Pennsylvania State University – Has since retired
J. Samuel Steel, Pennsylvania State University (Has since retired)
Aaron M. Yoder, University of Nebraska Medical Center – aaron.yoder@unmc.edu

Grain Dust Explosions

(Source: Penn State Ag Safety and Health)


Use the following format to cite this article:

Grain dust explosions. (2012) Farm and Ranch eXtension in Safety and Health (FReSH) Community of Practice. Retrieved from http://www.extension.org/pages/63142/grain-dust-explosions.


Grain dust explosions of any size can cause damage to equipment, reduced work time, and injury or death. By controlling grain dust emissions, you can provide a cleaner and safer work environment for your employees and community.

Grain dust is highly combustible, so a fire or an explosion can happen at a large grain-handling facility or in a grain-storage area on a local farm or ranch. Four basic elements must be present for a grain dust explosion to occur: fuel, oxygen, confinement, and an ignition source.

  • Fuel:  dust particles from wheat, oats, barley, or other types of grain that are suspended in the air or layers of grain dust in a confined space
  • Oxygen: normal oxygen levels and a continuous air supply
  • Confinement: areas of confined space such as grain bins, basement tunnels, bin deck galleries, silos, downspouts, and enclosed drag conveyors
  • Ignition source: short circuits, static electricity, lit cigarettes or lighters, overheated bearings, friction, cutting torches or welding devices, grinder sparks, lightning, and so on

Explosiveness of Grain Dust

The explosiveness of dust from different types of grain depends on the dust’s minimum explosive concentration (MEC), a measurement of particle size and energy nature. The accepted MEC for grain dust explosions is approximately 0.05 oz. per cu. ft. The optimum explosive concentration (OEC) equates to about 10 times the MEC, approximately 0.5 to 1.0 oz. per cu. ft. The MEC and OEC measurements vary depending on the type of grain. In an enclosed space with a height of 2 ft., the minimum depth of dust that can lead to explosion is 0.002 to 0.004 in. A typical sheet of paper is approximately 0.004 in. thick, so that critical MEC level can be reached in a very short time. Maintaining grain dust  levels at or below the MEC reduces the risk of explosion and increases visibility for workers.

Characteristics of a Dust Explosion

There are two phases in a major dust explosion: a primary explosion and a secondary explosion. The explosions, however, can happen almost simultaneously, so distinguishing between the primary and secondary explosions can be difficult. The dust from the first explosion may actually provide fuel for the secondary explosion by shaking loose settled dust. If fuel, oxygen, and an ignition source are present in a confined space, a series of destructive explosions can occur that may cause structural damage.

Most grain dust explosions occur at grain transfer points. At the transfer points, the movement of grain causes dust to be released at high levels, resulting in suspended dust particles. The suspended dust may collect in leg boots and elevator legs. Dust concentrations in bucket elevators can exceed MEC levels and pose the risk of explosion. 

Preventing Grain Dust Explosions

To reduce the risk of a grain dust explosion or fire, focus on controlling dust and reducing the sources of ignition. Preventative measures include continuous housekeeping, sanitation, and regularly scheduled maintenance. Implement a housekeeping or sanitation program to decrease grain dust in all work areas. Leg boots should be cleaned routinely to remove excess dust and kernels. Additional preventative steps include:

  • Developing and implementing a routine lubrication plan for bearings on the basis of the manufacturer’s recommendations
  • Developing and implementing a standard operating procedure (SOP) for housekeeping practices to minimize grain dust accumulation
  • Using a food-grade mineral spray on grain that is being transferred
  • Installing a bearing-temperature monitor in strategic locations throughout the grain handling system and implementing a program to periodically monitor bearing temperature
  • Installing belt-rub sensors inside bucket-elevator leg casings
  • Substituting steel cups with plastic cups in elevator legs
  • Using antistatic belting material in legs and horizontal belt conveyors
  • Establishing easy-to-open cleanout doors in the leg-boot side panel for easy removal of grain and dust
  • Installing dust aspiration systems or a ventilation system at grain transfer points
  • Training employees in safe work practices so that they can recognize and prevent hazards that could lead to a grain dust explosion
  • Posting No Smoking signs and actively enforcing the rule
  • Completing regularly scheduled inspections to locate any defective wiring or sparking and make repairs as needed
 

Use the following format to cite this article:

Grain dust explosions. (2012) Farm and Ranch eXtension in Safety and Health (FReSH) Community of Practice. Retrieved from http://www.extension.org/pages/63142/grain-dust-explosions.


Sources

Combustible dust in industry: Preventing and mitigating the effects of fire and explosions. (2005) United States Department of Labor, Occupational Safety and Health Administration. Retrieved from http://www.osha.gov/dts/shib/shib073105.html.

Grain handling. (n.d.) United States Department of Labor, Occupational Safety and Health Administration. Retrieved from http://www.osha.gov/SLTC/grainhandling/index.html.

Jones, C. (2011) Preventing grain dust explosions. Oklahoma State University Cooperative Extension Service. Retrieved from http://pods.dasnr.okstate.edu/docushare/dsweb/Get/Document-2604/BAE-1737web.pdf.


Reviewed and Summarized by:
Linda M. Fetzer, Pennsylvania State University – lmf8@psu.edu   
LaMar Grafft, East Carolina University – grafftl@ecu.edu
Davis E. Hill, Pennsylvania State University (Has since retired)
Carol Jones, Oklahoma State University – jcarol@okstate.edu
Dennis J. Murphy, Pennsylvania State University (Has since retired)
Aaron M. Yoder, University of Nebraska Medical Center – aaron.yoder@unmc.edu