Lightning Protection Systems


Use the following format to cite this article:

Lightning protection systems. (2014) Farm and Ranch eXtension in Safety and Health (FReSH) Community of Practice. Retrieved from http://articles.extension.org/pages/71216/lightning-protection-systems. 


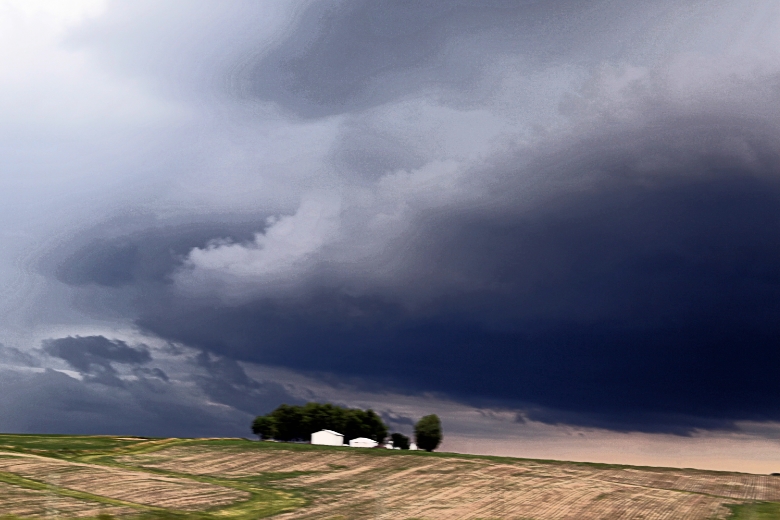
Lightning protection systems are recommended for all barns to reduce the risk of damage sustained from a lightning strike. Thunderstorms involving lightning occur across the United States but are most prevalent in central and eastern states. Lightning is a stream of pure energy, approximately 1/2- to 3/4-inch wide and surrounded by 4 inches of extremely hot air, that is looking for the path of least resistance between the clouds and the ground. The amperage from a lightning flash can be approximately 2,000 times greater than the current in a typical home.

Lightning and Potential Damage

The powerful force of lightning can ignite fires in buildings, damage electrical equipment, and electrocute humans and livestock. Typically, lightning enters a building by striking a metal object on the roof, directly striking the building, hitting a tree or structure (for example, a silo) that causes the strike to jump to a nearby building, or striking a power line or wire fence that provides a path into the structure. You can protect your farm or ranch structures by installing a lightning protection system, which will direct a strike away from your buildings and dissipate the strike in a safe manner.

Lightning Protection System Components

Barn Protection

(Source: Penn State Ag Safety & Health)

A lightning protection system consists of the following five parts: air terminals (lightning rods), conductors, ground connections (electrodes), bonding, and lightning arrestors.

Air terminals. Air terminals, or lightning rods, are metal rods or tubes installed at every projecting high point of a building—such as the peak, a dormer, a flagpole, or a water tank—to intercept a lightning bolt. Solid copper rods should be a minimum of 3/8-inch in diameter, and solid aluminum rods should be a minimum of 1/2-inch in diameter. Rods should extend between 10 and 36 inches above the projecting object. Typically, rods are 10 to 24 inches long; extra support or a brace is needed for a rod that is more than 24 inches long. The most effective spacing is 20 feet apart for rods that are less than 24 inches long or 25 feet apart for rods that are between 24 and 36 inches long. Additionally, a rod should be located within 24 inches of the end of any building ridge or projecting object. Strategic placement of rods on a structure ensures that lightning will strike the rods rather than another part of the building.

Conductors. Conductors, which are copper or aluminum cables, provide the connection between the air terminals and the earth to direct the lightning strike deep into the earth where it can safely dissipate. Choose copper or aluminum rather than a combination of the two because galvanic or chemically corrosive action can occur between the two elements. Main conductors connect all of the lightning rods with the down conductors and then connect to the ground connections.

Ground connections. Ground connections, or electrodes, provide contact with the ground to safely dissipate the lightning charge. A minimum of two ground connections should be used for most buildings; additional ones may be needed for larger structures. The type of ground connection may depend on the conductivity of the soil in your area. Ground electrodes should be 1/2-inch diameter, 10-foot long copper-clad steel or solid copper rods driven at least 8 feet into the ground.

Bonding. Bonding involves branch conductors that protect against sideflashes by connecting metal objects (such as ventilation fans, water pipes, and so on) with the grounding system. Common grounding can eliminate lightning sideflashes. Grounding is achieved when all electrical systems, telephone systems, and underground metal piping are connected to the lightning protection system.

Lightning arrestors. Lightning arrestors provide protection against a strike entering your building through the electrical wiring system and thereby causing potential power surges that may result in severe damage to electrical devices. To provide the best possible protection, lightning arrestors should be installed on the building’s exterior where the electrical service enters the building or at the interior service entrance. 

Protection of Livestock and Trees

Examine your farm or ranch with a certified installer to determine whether lightning protection should be extended to protect valuable trees; trees located within 10 feet of a structure, such as a silo; or trees used for shade by livestock. If livestock stand under a tree, they can be killed by a direct lightning strike to the tree or from contact with resultant charged soil. To avoid this scenario, consider removing trees favored by livestock, fencing livestock away from trees, or providing protection with a conductor system. 

Lightning protection for a tree involves placing air terminals at the tips of the main trunk and attaching a full-size grounding cable to a ground rod. The ground rod should be located away from the tree’s root system. Air terminals with smaller cables can be attached to main branches. If the tree is 3 feet in diameter or larger, use two ground rods attached to the main conductor system.

Protection of Fencing

Lightning can travel up to 2 miles along an ungrounded wire fence, posing a threat to humans and livestock. Fences may be attached to wooden posts, steel posts set in concrete or to buildings, and even trees (not recommended). In all circumstances, the fence should be grounded to safely route the lightning’s voltage into the earth. To ground a fence, drive 1/2-inch steel rods or 3/4-inch pipe 5 to 10 feet into the ground next to wooden fence posts at intervals of 150 feet. Allow a few inches of the ground rod or pipe to extend past the top of the adjacent fence post. Attach the rod or pipe to the fence post with pipe straps to ensure a tight connection.

System Installation and Maintenance

A certified installer should install your lightning protection system to reduce the risk of a system failure and to ensure that your system meets necessary codes and standards. The Lightning Protection Institute certifies systems meeting all its requirements. To maintain a system’s certification, regular maintenance and annual inspection must be completed. Damage due to high winds, building additions, and roof repairs or upgrades can alter a system’s performance. To locate a certified installer in your area, click one of the resource links below:

Lightning Protection Institute

Underwriters Laboratories

Resources

Click here for more information about structural lightning safety from the National Lightning Safety Institute.

Click the link below for more detailed information about the related topic.

Lightning Safety


Use the following format to cite this article:

Lightning protection systems. (2014) Farm and Ranch eXtension in Safety and Health (FReSH) Community of Practice. Retrieved from http://articles.extension.org/pages/71216/lightning-protection-systems. 


Sources


Chamberlain, D. and Hallman, E. (1995) Lightning protection for farms. Cornell Cooperative Extension. Retrieved from http://ecommons.library.cornell.edu/bitstream/1813/5168/2/LIGHTNING%20PROTECTION%20FOR%20FARMS.pdf.

Linn, R. (1993) Lightning protection for the farm. Montguide. Montana State University. No longer available online.

Murphy, D. (1988) Lightning protection for the farm. The Pennsylvania State University. Retrieved from http://nasdonline.org/1168/d001010/lightning-protection-for-the-farm.html.

Specifications for lightning protection – ASAE engineering practice. (1998) The Disaster Handbook 1998 National Edition. University of Florida Institute of Food and Agricultural Services. No longer available online.


Reviewed and Summarized by:
Linda M. Fetzer, Pennsylvania State University – lmf8@psu.edu
William C. Harshman, Pennsylvania State University (Has since retired)
Tom Karsky, University of Idaho (Has since retired)
Dennis J. Murphy, Pennsylvania State University (Has since retired)
Aaron M. Yoder, University of Nebraska Medical Center – aaron.yoder@unmc.edu

Lightning Safety

Photo of storm clouds approaching

Photos provided by the Central States Center for Agricultural Safety and Health (CS-CASH)


Lightning and thunderstorms typically occur during the spring and summer months. As human beings, we are great conductors of lightning because approximately 65 percent of the human body consists of salt and water. Lightning can cause injury or death to humans and animals, either by direct strike or transmission indirectly to and through the body. Also, it can cause structure fires.

Cloud-to-ground lightning can cause injuries by direct or indirect means because the current can branch off to a person from a nearby tree, fence, or other tall object. Lightning flashes can send a current through the ground to a person after hitting a nearby object, such as a tree. Additionally, injuries or death can occur due to fires or falling objects caused by a lightning strike.

Awareness and Preparation

National Oceanic and Atmospheric Administration (NOAA) Weather Radio and local radio/television stations are the best sources for the latest forecasts and emergency updates in your area. Remember that a thunderstorm watch means that storms are possible whereas a thunderstorm warning means that severe weather has been reported by spotters or radar in your area. Even though it is not possible to have lightning without thunder, there are times when you cannot distinctively hear the thunder. When this happens, typically during the summer months, the lightning you see is called heat lightning. The term dry lightning refers to lightning that occurs without rain. This type of lightning can cause forest fires.

In preparation for thunder and lightning storms, you and your family should take the following actions:

  • Choose a place in the house where family members will meet in the event of a storm.
  • Make a list of specific items that need to be brought inside during a storm.
  • Keep trees and shrubbery trimmed and remove debris from around buildings to reduce the potential that items (for example, weak tree limbs) will become projectiles.
  • Ensure that you have a place where your animals can go to be protected.
  • Consider installing permanent shutters that can be closed easily and quickly for better protection.
  • Install lightning rods on your home, barn, and other structures that house animals. Also, install a lightning arrestor or diverter on any electric fence.

When and Where to Seek Shelter

The National Weather Service recommends using the 30/30 rule to know when to move to safety and when to return to your activities. If lightning is within six miles, locate a safe place and stay there until no lightning has been seen nor thunder heard for 30 minutes. The “flash to bang” count can determine the distance of the lightning. When you see lightning, start counting seconds (one one-thousand, two one-thousand, and so on) and stop when you hear the thunder. Every five seconds equals a mile, so move to safety if the count is less than 30 seconds.

Choose your safe place wisely. A fully enclosed metal vehicle or building is a safe shelter if the outer metal shield is not compromised. This means you should keep windows closed; avoid objects that penetrate from the outside to the inside; and in a vehicle, do not touch external objects such as door handles or radio knobs.  In a lightning storm, avoid water, high and open ground, metal spaces, canopies, picnic or rain shelters, trees, and electrical/electronic equipment. If you are in a structure that has curtains or blinds over windows, close them to prevent glass shards from flying into the structure from a broken window.

If you cannot find a safe shelter, place yourself as low as possible to the ground without lying on the ground. Seek low ground, such as a ditch, or crouch down with your feet together and your hands over your ears to protect your hearing.

During a lightning storm, take the following precautions:

  • Do not hold anything that can conduct electricity, such as a shovel, a hoe, or a golf club.
  • Do not operate farm equipment.
  • Avoid water! Do not take a bath or a shower or run water for any purpose (for example, to wash dishes). If you are swimming or boating, get out of the water.
  • Protect your electronics and electrical items from lightning strikes and power surges by unplugging televisions, computers, and other valuable appliances.
  • Avoid electric fences, clotheslines, metal pipes, rails, telephone poles, and other conductors.

Fires and Entrapments due to Lightning

An electrical fire can occur when an appliance or a tool catches on fire. If possible, unplug the appliance from the outlet; however, if doing so places you in danger, turn off the current at the fuse box. Use an ABC or BC fire extinguisher on an electrical fire, and remember never to pour water on an electrical fire. Leave the area, and contact your local fire department if the fire is more serious than a simple appliance fire. If you notice fallen electrical wires, report them immediately to the police or local utility company. If you find someone trapped in a vehicle by fallen wires, tell the person to stay in the vehicle without touching any metal parts of the car while you go for help.

Injury Types and First Aid

Most lightning strike victims survive, but common injuries include burns, broken bones, heart attacks, and neurological damage. Short-term effects of lightning strike include memory loss, chronic headaches, ringing in the ears, fatigue, personality changes, muscle spasms, joint stiffness, numbness, sleep difficulties, and dizziness. Additional injuries can be caused by fires or objects that fall after being struck by lightning.

First aid needs to be started immediately after a lightning strike. If the person is conscious, check his or her breathing and pulse. If there is no pulse, begin cardiopulmonary resuscitation (CPR). Check the victim for additional injuries, such as fractures, but do not move the person if you suspect a spinal injury. If the victim sustained an electrical burn, cover the burned area with a dry, sterile dressing. Remember to look for multiple burn areas because separate burned areas may exist where the current entered and exited the victim’s body. Also look for burned areas on the person’s extremities (fingers and toes) and on areas next to buckles or jewelry. Contact your local emergency responders. Even if a person does not appear to be injured, he or she still should be seen by a medical professional.

Resources

Click here for more information about personal lightning safety from the National Lightning Safety Institute.

Click here for more information about NOAA Weather Radio.

Click here for information about lightning safety for outdoor workers from the National Lightning Safety Institute.

Click the link below for more detailed information about the related topic.

Lightning Protection Systems


Sources

Cyr, D. and Johnson, S. (2003) Lightning safety. University of Maine Cooperative Extension. Retrieved from http://umaine.edu/publications/2315e/.

Kithil, R. (n.d.) Decision tree for personal lightning safety. National Lightning Safety Institute. Retrieved from http://www.lightningsafety.com/nlsi_pls/decision_tree_people.html.

Thunderstorm safety. (n.d.) American Red Cross. Retrieved from http://www.redcross.org/prepare/disaster/thunderstorm.

Thunderstorm safety checklist. (2009) American Red Cross. Retrieved from https://www.redcross.org/get-help/how-to-prepare-for-emergencies/types-o….

 
Reviewed and Summarized by:
Linda M. Fetzer, Pennsylvania State University – lmf8@psu.edu
William C. Harshman, Pennsylvania State University (Has since retired)
Tom Karsky, University of Idaho (Has since retired)
Dennis J. Murphy, Pennsylvania State University (Has since retired)
Aaron M. Yoder, University of Nebraska Medical Center – aaron.yoder@unmc.edu
 

Silo Fire Prevention and Management

Rescue trucks at silo

Photo source: Penn State University
Use the following format to cite this article:
Silo fire prevention and management. (2015) Ag Safety and Health Community of Practice. Retrieved from https://ag-safety.extension.org/silo-fire-prevention-and-management/.

Because the ingredients needed for a fire to occur are present in silos, agricultural producers who have silos should take steps to minimize the likelihood of silo fires and be prepared to manage silo fires should they occur. Fire prevention steps are similar regardless of what type of silo you have. The approach to managing a fire, however, is based on the type of silo in which the fire is burning.

Ingredients for Fire

Three ingredients are needed for anything to burn: a heat source, air, and fuel.

  • The heat source for a silo fire is bacterial action within the silage. When forage material is cut, bacterial action on the forage begins. This action produces heat until all the oxygen in the pile is consumed. Microorganisms are killed at 250°F–400°F, causing a breakdown in the forage through an oxidation process called pyrolysis. Pyrolysis allows oxygen in the silo to support a smoldering fire that can result in charred cavities in the silage. Once the oxygen is consumed, the fermentation process begins and continues until the forage becomes stable.
  • The air source for a silo fire includes air that is trapped in chopped forage during harvest and air that blows into the silo. The dryer the material, the more trapped air there is.
  • The fuel source for a silo fire is the silage, although it typically is not a highly effective fuel source because of its moisture content. Even dry silage is too wet to burn quickly.

Causes of Silo Fires

The three main types of upright silos found on farm operations are conventional, oxygen-limiting, and modified oxygen-limiting. Typically, silo fires occur more frequently in conventional silos than in oxygen-limiting silos because oxygen is present in greater amounts in conventional silos. Many silo fires occur in the top layer (approximately the top 10 feet) of dry, loosely packed silage. Such fires can be the result of an overheating unloader motor but more often are caused by spontaneous combustion. Spontaneous combustion can occur when new silage having a too-low moisture content (less than 45%) is placed in the silo, when fresh silage is placed on top of old silage, or when the silo has poorly maintained doors and walls. Putting new silage on top of old silage is especially risky if the old silage is too dry. The dryer the material is, the more air that will be trapped when fresh, wetter material is placed on top of it. That trapped air can allow excessive heating and support a smoldering fire.

A silo fire can start from a source outside the silo as well. The two most common examples of these types of fires are a fire in the chute from a shorted-out electrical wire or a fire from an adjacent barn fire.

Prevention of Silo Fires

Prevention of silo fires involves performing proper maintenance on silos and unloaders and taking appropriate steps when harvesting and storing forages.

Silo and Unloader Maintenance

When a silo is empty, inspect the silo walls (especially the lower 10–15 inches), the silo doors, and the unloader system. Make any necessary repairs. If you have an oxygen-limiting silo, pressure-test it on a regular basis (at least once every other year, preferably when empty). If air is allowed to leak into an oxygen-limiting silo, forage quality can decline, and the chance of a fire developing increases. Many fires have started in oxygen-limiting silos that have been unused for several years but not emptied.

For the unloader system, examine belts, bearings, wiring, and the motor. Lubricate the lift cables, and immediately replace any lift cable showing signs of kinks, cuts, or corrosion. Check for damaged insulation or terminals on the unloader power cable, and repair or replace damaged materials as needed.

Harvesting and Storage Recommendations

Implementing the following steps for harvesting and storing forages will decrease the risk of a silo fire occurring:

  1. Minimize drying time to reduce respiration.
  2. Chop forage at the correct theoretical length cut (TLC). The TLC for hay crop silage is 3/8 inch; the TLC for corn silage is 1/4 inch. Follow the silo manufacturer’s recommendations.
  3. Ensile at 30%–50% dry matter content (i.e., 50%–70% moisture content), based on the silo manufacturer’s recommendations. Using this approach will optimize fermentation.
  4. Leave the silo sealed for at least 14 days to allow complete fermentation to occur.
  5. Unload 2–6 inches per day, and maintain a smooth surface. Using this unloading schedule will help you stay ahead of any spoilage. Spoilage is caused by the bacterial action that can cause heating.
  6. Discard deteriorated silage. Performing this step will help eliminate a fuel source for potential fires and minimize animal health problems.

Management of Silo Fires

Managing silo fires involves monitoring silage to detect a fire early, taking the proper steps when you suspect or discover that a fire is burning, and understanding how fires in different types of silos are extinguished.

Monitoring of Silage

Silage is costly to replace, so one of the main goals of managing a silo fire is to locate the fire and control the area so that only a minimum amount of silage is affected. The first step in managing a silo fire is early detection, so monitor a silo for three weeks postharvest. This length of time is the critical period for fermentation and heating to occur. Because silage burns slowly, detecting a fire early allows you time to evaluate your options and develop a plan for addressing the fire.

Response to the Presence of a Fire

If you suspect or discover a silo fire, contact your local fire department immediately. A silo is a confined space, and firefighters are obligated to follow the US Department of Labor, Occupational Safety and Health Administration (OSHA) Confined Space Standard for entry into a silo. When you contact the fire department, indicate the type of fire so that the fire department can dispatch the correct personnel and equipment (e.g., thermal imaging camera, infrared heat gun, self-contained breathing apparatus).

Wait for the fire service personnel to arrive. Do not enter the silo or climb the chute because unknown factors, such as fire gases or burning embers falling down the chute, may exist. Only rescue personnel with self-contained breathing apparatuses or supplied-air respirators should enter an upright silo because of toxic gases that can be present due to the fermentation process or the fire. The most typical gases in silos include carbon monoxide, carbon dioxide, nitric oxide, nitrogen dioxide, and nitrogen tetroxide. Additional gases can be present due to the burning of substances such as silo liners and epoxy coatings.

While waiting for fire service personnel to arrive on the scene, take the following steps:

  1. Close the bottom of the chute to reduce airflow that may be fanning the fire. Use sheet metal or another noncombustible material to close the chute.
  2. Remove all livestock from any exposed or adjacent buildings.
  3. Spray water to wet down the area around the silo chute to prevent the fire from spreading.
  4. Place noncombustible shields (metal siding, etc.) over any openings in the silo or chute to prevent sparks and embers from flying into or onto other buildings.

Fire Management Approaches for Various Silo Types

It is important to understand how silo fires are managed in various silo types. A fire in a conventional silo will not burn out; instead, it must be extinguished. A fire in oxygen-limiting silo may be managed so that it burns out, or it may have to be extinguished. To extinguish a silo fire, it is necessary to eliminate one of the ingredients needed for fire to occur. Trained fire service personnel are needed to extinguish a fire in any type of silo.

Conventional Silo

Because a conventional silo is not airtight, fire service personnel cannot smother the fire by eliminating the air source. The best approach is to locate the heat source and remove it. If possible, fire service personnel should avoid flooding the silo with water for the following reasons: doing so could ruin good feed; it is difficult to unload wet silage with an unloader; water can damage the silo; and the introduction of water can actually cause additional fires in the silo.

Oxygen-Limiting Silo

With proper management, you may be able to allow a fire in an oxygen-limiting silo to burn out. To reduce any additional air from entering the silo, close the top hatch cover (without latching it) and the bottom unloading door. CAUTION If the silo is heavily smoking or rumbling (vibrating), do not attempt to close the top hatch; rather stay off the silo! The assumption is that after you close the top hatch cover and bottom unloading door, no air will go into the silo, so the fire eventually will use up the residual air in the silo and burn out over time. However, this process can take up to three weeks. If this approach does not work, trained personnel—usually representatives of the silo manufacturer/dealer—can inject carbon dioxide or liquid nitrogen into the silo, causing any oxygen trapped by the silage to be consumed and allowing the fire to burn out.

A concern related to a fire in an oxygen-limiting silo is the potential buildup of confined gases within the silo. Through pyrolysis, a smoldering fire will produce large quantities of carbon monoxide and other products that can result in an explosion when combined with air from outside the silo. Consequently, you should do nothing that will cause air to go into the silo. For example, do not add water or foam or open any portals into the silo.

Modified Oxygen-Limiting Silo

For fire management purposes, you can treat an oxygen-limiting silo that has been modified through the installation of a top unloader the same way as a nonmodified oxygen-limiting silo, at least initially. However, in spite of such modification, these structures are still airtight enough to allow for a dangerous buildup of carbon monoxide in a smoldering fire. In more than one case, an explosion has occurred during firefighting operations involving a modified oxygen-limiting silo.

Additional Recommendations

  • Specialized training in proper techniques for responding to silo fires is available for fire department personnel. If your local firefighters have not had such training, encourage them to locate and participate in a training program.
  • If you no longer use a silo, make sure that it is completely empty. Residual silo material can dry out and pose a fire risk.
  • In the event of a silo fire, do not apply cool or cold water to the outside of a silo because doing so may cause structural damage.
  • After a silo fire, inspect the silo, and make any necessary repairs.

Resources

Click here for a guide to assisting firefighters at the scene of a silo fire.

Use the following format to cite this article:
Silo fire prevention and management. (2015) Ag Safety and Health Community of Practice. Retrieved from https://ag-safety.extension.org/silo-fire-prevention-and-management/.

Sources

Florida Forage Handbook. (2008). University of Florida Institute of Food and Agricultural Sciences (IFAS). Retrieved from http://edis.ifas.ufl.edu/pdffiles/ag/ag36200.pdf.

Hill, D. (2009) Silo fires—protect your investment. Pennsylvania State University. Retrieved from http://www.farmemergencies.psu.edu/SiloFires-ProtectYourInvestment2.pdf.

Murphy, D., and Arble, W. (2000) Extinguishing fires in silos and hay mows. New York: Natural Resource, Agriculture, and Engineering Service.

Article Contributor: 
Davis E. Hill, Pennsylvania State University – Has since retired
Reviewed and Summarized by:
Linda M. Fetzer, Pennsylvania State University-lmf8@psu.edu
Carol Jones, Oklahoma State University–Has since retired
Dennis J. Murphy, Pennsylvania State University – Has since retired
Aaron M. Yoder, University of Nebraska Medical Center–aaron.yoder@unmc.edu

Farm Family Emergency Response Program

The Farm Family Emergency Response Program provides awareness training for individuals living or working on farms or ranches and outlines basic responses and actions individuals should consider prior to the arrival of emergency response personnel to the scenes of agricultural emergencies. Effective action by individuals at the scene of an accident can raise the likelihood of a positive outcome for an injured victim.

Click here to be directed to the Farm Family Emergency Response Program site.

Program Details

Target Audience

The program is designed for individuals who work in production agriculture or live on farms or ranches or in rural areas. This training is especially important for farm and ranch managers and employees, spouses and family members living on farms or ranches, 4-H members, and FFA groups.

Learning Objectives and Goals

The Farm Family Emergency Response Program was designed to achieve the following objectives:

  • To teach individuals how to keep themselves physically and emotionally safe during agricultural emergencies or rescues
  • To teach individuals the types of actions that will have a positive impact on the well-being of accident victims
  • To teach people how to summon additional help and engage those individuals in the rescue response
  • To reinforce the importance of first aid and CPR training for individuals involved in production agriculture

Instructors

Instructors for this program typically include Cooperative Extension educators, hospital personnel, agricultural education teachers, and emergency services instructors. The instructor materials include a 20-minute tutorial explaining how to present the program, a sample presentation demonstration, reproducible class materials, instructional materials, and module narratives.

Learning Activities

The Farm Family Emergency Response Program is divided into 12 modules that cover topics related to the primary causes of agricultural injury and death. Each module includes a period for the discussion of prevention strategies. Participants are encouraged to implement safety strategies and recommendations on their farms and ranches. 

Evaluation

The instructor should measure the effectiveness of the class by having participants complete the pretest and posttest located in the instructor’s manual. Participants complete registration cards that can be used for follow-up to determine whether participants made changes on their farms or ranches because of the program.


Reviewed and Summarized by:
Linda M. Fetzer, Pennsylvania State University – lmf8@psu.edu
Davis Hill, Pennsylvania State University (Has since retired)
Dennis J. Murphy, Pennsylvania State University (Has since retired)
Aaron M. Yoder, University of Nebraska Medical Center – aaron.yoder@unmc.edu
 

Emergency Response and Preparedness Publications


Agricultural Emergencies

Topic Title Organization Pub Date
Accident Extrication Procedures for Farm Families and Employees University of Georgia Cooperative Extension 2012
Initial Farm Injury Emergency Response The Ohio State University 2011
First Response to Farm Accidents University of Maine Extension 2002
Preplanning for Farm Emergencies University of Maine Extension 2002
Pre-Response Plan Virginia Cooperative Extension 2009
Rural Security Planning: Protecting Family, Friends, and Farms Purdue Extension 2006
Tractor and PTO Accidents and Rescues University of Maine Extension 2002

Fire and Fire Prevention

Topic Title Organization Pub Date
Electrical Fires: Prevention and Extinguishing University of Maine Extension 2002
Fire Prevention and Safety Measures Around the Farm Rutgers Cooperative Extension 2009
Fires: Detection and Equipment to Fight Them University of Maine Extension 2002

First Aid

Topic Title Organization Pub Date
Basic First Aid University of Maine Extension 2002
First Aid for Bee and Insect Stings University of Maine Extension 2002
First Aid for Electrical Accidents University of Maine Extension 2002
First Aid for Eyes University of Maine Extension 2002
First Aid Kits for the Farm and Home University of Maine Extension 2002

Weather-Related Issues

Topic Title Organization Pub Date
Is Your Family Prepared for an Earthquake? University of Missouri Extension 2008
Winter Driving Safety University of Maine Extension 2002


Preventing Fires in Baled Hay and Straw


Use the following format to cite this article:

Preventing fires in baled hay and straw. (2012). Farm and Ranch eXtension in Safety and Health (FReSH) Community of Practice. Retrieved from http://www.extension.org/pages/66577/preventing-fires-in-baled-hay-and-straw.


Most hay fires occur within the first six weeks after baling. Understanding the causes of fires in stored hay and learning how to reduce fire hazards will protect your feed supply and could prevent the loss of time and money associated with a fire. 

Causes of Fires in Baled Hay or Straw

Moisture content is the main factor that causes hay and straw to spontaneously combust. Hay fires are more common than straw fires, for reasons involving the type of forage, the moisture content in the stored forage, and heat production.

After forages are cut, respiration of plant fibers (burning of plant sugars to produce energy) continues in plant cells, causing the release of a small amount of heat. When the forages are cut, field dried, and baled at the recommended moisture level (20% or less), plant cell respiration slows and eventually ends. 

When forages are baled at moisture levels of greater than 20%, the right environment is provided for the growth and multiplication of mesophilic (warm temperature) bacteria found in forage crops. Mesophilic bacteria release heat within the bale and cause the internal bale temperature to rise between 130ºF and 140ºF. At this temperature range, bacteria die and bale temperature decreases. Fire risk is greater for hay than for straw because a hay bale’s interior temperature does not cool after the first initial heating cycle. The respiratory heat created by the mesophilic bacteria provides a breeding ground for thermophilc (heat loving) bacteria. Basically, the higher the moisture content, the longer a bale will remain at a higher temperature. For example, a bale with 30% moisture content may have higher interior bale temperature for up to 40 days. When thermophilic bacteria are present, they multiply and produce heat, which can raise interior bale temperature to over 170°F. At these temperatures, spontaneous combustion can occur.

Additional factors that contribute to the risk of hay fires include the volume of the mow or bale stack, bale density, and ventilation or air flow around the stacked bales. Bales with a lower density that are stacked lower and have good air flow and ventilation have a lower risk of overheating.

Decreasing the Risk of Fire

The best way to reduce the risk of a hay fire is to bale hay at a moisture content of 20% or less because at this moisture level, microbial activity decreases. There are several ways of reducing moisture content in baled hay:

  • Baling under appropriate conditions: Weather plays a critical role in achieving the appropriate moisture level in baled hay. The recommended weather conditions for haymaking are a slight wind and a humidity level of 50% or less. Because hay has a higher moisture content in the morning, it is recommended that you bale later in the day. The recommended practice for haymaking is to mow hay in the morning and allow it to dry in the field for a minimum of one full day prior to baling.
  • Using specialized equipment: Another way of decreasing moisture content is to use specialized haying equipment designed to increase drying rates. Such equipment includes tedders, windrow inverters, hay rakes, and conditioning equipment.
  • Using hay preservatives: Hay preservatives, such as liquid propionic acid, applied to the hay during baling inhibit or reduce the growth of bacteria in hay with a high moisture content. 

Another way to reduce the risk of a hay fire is to ensure that stored hay remains dry. 

  • When storing hay inside, make sure the barn or storage area is weathertight and has proper drainage to prevent water from entering the barn. 
  • When storing hay outside, cover the hay with plastic or another type of waterproof material. If you are unable to cover the bales, arrange the bales so that air can circulate between them to promote drying. Bales can be protected from ground moisture by storing them on a bed of gravel or lifting them off the ground on used tires, poles, or pallets.

Monitoring the Temperature of Stored Hay

If you are concerned that hay may have been baled at too high a moisture content, monitor the internal bale temperature twice daily for the first six weeks after baling. For safety reasons, you must work with a partner when checking the temperature of stacked bales. One of you stands atop the bales to measure the internal temperature while the other observes. The person testing the hay should wear a harness and a lifeline that is attached to a secure object. In the event of an emergency, such a system allows the observer to pull the person checking the temperature out of the hay. Due to the potential dangers of this situation, this task should not be assigned to youth workers.

You can use a commercial thermometer to test the temperature of baled hay, but commercial thermometers are not always the appropriate length to monitor the interior zone of baled hay. If a commercial thermometer does not meet your needs, you can fabricate a probe from a 10 ft. length of 3/4 in. iron pipe. Drill eight holes that are 3/16 in. in diameter about 3 in. from one end. Hammer that end of the pipe to form a sharp edge with which to probe. Insert the probe into a hay bale, and use a piece of light wire to lower a thermometer down into the end of the pipe. Alternatively, you may use a piece of 3/8 in. pipe that is 8 to 10 ft. long to test the temperature of hay.

To test the temperature of the hay, place wooden planks or plywood across top of the bales so that the weight of the person standing on the hay is distributed evenly and he or she will be at less risk of falling into a burned-out cavity. Drive a commercial thermometer or a homemade probe into the bale of hay. If you use a fabricated probe, keep the thermometer in the probe for approximately 10 to 15 minutes to obtain the temperature reading. If you use a 3/8 in. pipe, leave the pipe in place for 20 minutes. When you remove the pipe from the hay, if the pipe is too hot to hold in your hand, then you should remove the hot hay.

The following temperature chart outlines further actions that may need to be taken depending on the temperature of the hay.

Critical Temperatures and Action Steps
Temperature (ºF) Condition and Action
125 No action needed.
150 Hay is entering the danger zone. Check temperature twice daily. Disassemble stacked hay bales to promote air circulation to cool the hay.

160

Hay has reached the danger zone. Check hay temperature every couple of hours. Disassemble stacked hay bales to promote air circulation to cool the hay.
175 Hot spots or fire pockets are likely. Alert fire services to the possible hay fire incident. Stop all air movement around the hay.
190 With the assistance of the fire service, remove hot hay. Be aware that hay could burst into flames.
200 or higher With the assistance of the fire service, remove hot hay. Most likely, a fire will occur. Be aware that hay could burst into flames.

(Source: National Resource, Agriculture, and Engineering Service [NRAES])

Hay Fire Hazards

The following three hazards exist from hay fires: 

  • Flare-Ups: When the internal hay bale temperature is between 150ºF and 170ºF, the potential exists for spontaneous combustion, and the hay should be moved to allow it to cool. If the temperature is at the higher end of the range, moving the hay could expose it to oxygen and cause flare-ups. Contact your local fire department and have charged water hoses available. 
  • Burned-Out Cavities: These cavities form when temperatures deep within stored hay reached high temperature levels and the hay has burned. A person can become trapped in a burned-out cavity if he or she is walking over the top of the hay pile. Due to the risk of a person falling into a burned-out cavity, at least two people should investigate a hay mow.
  • Toxic Gas: Toxic gases such as carbon monoxide can be released by smoldering and burning hay. Chemically treated hay may emit additional toxic gas vapors. A trained fire-rescue worker with a self-contained breathing apparatus (SCBA) should be called to assist at the scene in either situation.

When a Fire Occurs

In the event of a fire, or even when hay is smoldering, contact the fire department immediately. Your next action step and main priority should be to protect human life. Remember that you can replace hay, buildings, and equipment, but you cannot replace human life.

Before taking any action to fight a fire, consider other valuable actions you can take to address the situation prior to the arrival of fire fighters, including the following:

  • Account for all personnel on your farm or ranch operation.
  • Check the area for flammable products. If any are present, immediately leave the area and upon the fire fighters’ arrival, make them aware of the flammable products.
  • Determine whether electricity needs to be turned off in buildings.
  • If the hay fire is located inside a building that houses livestock, consider personal safety before relocating livestock to an area away from the structure.
  • Remove any extra vehicles or machinery from the area around the fire to clear space for the fire service equipment.
  • Stage bale-moving machinery out of the immediate fire area, but have it available to help move bales, as directed by fire fighters.
  • Retrieve material safety data sheets (MSDSs) for any chemical preservatives that may have been used on the hay and that fire fighters will need to review.

Moving hay bales is hot, smoky, and physically demanding work that can cause injuries, exhaustion, smoke inhalation, and heart attacks. Individuals involved at the scene need to be monitored and should receive medical attention should they exhibit signs related to any of these health concerns.

Things to Remember:

  • Most hay fires related to moisture levels occur in the first six weeks after baling.
  • When baling hay, keep moisture levels at 20% or less.
  • Keep baled hay dry by covering it or storing it inside.
  • Monitor internal bale temperature on a regular basis.
    • Youth workers should not be given the task of checking hay temperatures.
  • If you store uncovered bales outside, arrange bales so that air can circulate around them.
  • The use of ventilation changes based on the temperature of the hay. At lower temperatures, increased ventilation around the bales will help the hay return to an acceptable temperature. If hay temperatures reach 175ºF, stop ventilating hay because the increased air flow could feed a fire.
  • Maintain MSDSs for any crop preservatives that may have been used on the hay, and have the MSDS readily available for fire service personnel.


Use the following format to cite this article:

Preventing fires in baled hay and straw. (2012). Farm and Ranch eXtension in Safety and Health (FReSH) Community of Practice. Retrieved from http://www.extension.org/pages/66577/preventing-fires-in-baled-hay-and-straw.


Sources


Gay, S., Grisso, R., Smith, R., & Swisher, J. (2003) Hay fire prevention and control. Virginia Cooperative Extension. Retrieved from https://www.uky.edu/Ag/Forage/Hay%20Fire%20Prevention%20and%20Control%20….

Harshman, W., Yoder, A., Hilton, J., & Murphy, D. (2011) Hay storage fires. Hazardous Occupations Safety Training in Agriculture 3.7.2. Retrieved from http://www.extension.org/sites/default/files/NSTMOP%20Task%20Sheets%20Se….

Lemus, R. (2009) Hay storage: Dry matter losses and qualify changes. Mississippi State University Extension Service. Retrieved from http://msucares.com/pubs/publications/p2540.pdf.

Murphy, D. & Arble, W. (2000) Extinguishing fires in silos and hay mows. New York: Natural Resource, Agriculture, and Engineering Service (NRAES).


Reviewers, Contributors, and Summarized by:
Linda M. Fetzer, Pennsylvania State University – lmf8@psu.edu
LaMar J. Grafft, East Carolina University grafftl@ecu.edu
Dave E. Hill, Pennsylvania State University  (Has since retired)
Dennis M. Murphy, Pennsylvania State University – (Has since retired)
Cheryl Skjolaas, University of Wisconsin  skjolaas@wisc.edu
Aaron M. Yoder, University of Nebraska Medical Center – aaron.yoder@unmc.edu


PA Agricultural Rescue Training


Ag Rescue Training

(Source: Pennsylvania State University. Agricultural Safety and Health)

Recognizing the importance of agricultural rescue training and the lack of such training for county and state emergency responders, members of the Pennsylvania State University (Penn State) Agricultural Safety and Health team developed the PA Agricultural Rescue Training program to provide necessary training to emergency service workers so that they can respond effectively to agricultural emergencies.

Website Link

Click here to be directed to the PA Agricultural Rescue Training website.

Target Audience

The training is designed for local emergency service workers, including fire, rescue, emergency medical services (EMS), county animal response team (CART), and police.

Learning Objectives and Goals

The PA Agricultural Rescue Training program at Penn State is concerned with developing and delivering training that will:

  • help emergency personnel become aware of the many hazards that could happen while managing an agricultural emergency.
  • help emergency personnel understand the importance of pre-planning for various farm emergencies in their communities.
  • help fire, EMS, and CART units specialize in various aspects of agricultural rescue—such as incidents involving machinery, chemicals, animals, or confined spaces—and become technically competent in at least one of these areas.
  • encourage fire, EMS, and CART units to work together to develop effective agricultural rescue strategies that will result in higher quality pre-hospital patient care and animal response.
  • teach emergency responders to be proficient within their area of expertise (fire, rescue, EMS, CART) while managing farm emergencies.

Learning Activities

Ag Rescue Training

(Source: Pennsylvania State University. Agricultural Safety and Health)

PA Agricultural Rescue is divided into module units. Depending on the units, sessions are taught in one or two days of classroom instruction. Many of the training opportunities involve classroom instruction and hands-on experiential learning. The following modules are available:

  • Agricultural Emergencies Awareness provides an overview of agricultural emergencies.
  • Emergency Rescue in an Agricultural Environment trains responders about the uniqueness of farm rescues and provides instruction in the application of learned techniques in non-farm emergencies.
  • Managing Farm Chemical Emergencies trains responders to evaluate and respond to emergencies involving agricultural chemicals.
  • Farm Confined Space Emergencies Awareness trains responders to recognize and evaluate various farm confined space emergencies. Participants learn to apply OSHA Confined Space Standards to confined space situations and to respond effectively to this type of emergency.
  • Large Animal Rescue Training trains CART members and emergency responders to better manage emergencies involving large (farm) animals.
  • Introduction to Grain Elevator and Feed Mill Fires teaches emergency responders about the importance of preplanning for fires and emergencies involving grain elevators and feed mills.
  • Animals in Barn Fires provides participants with an understanding of farm animal behavior and how animals may react in a fire situation.

Evaluation

Participants are required to complete a pre- and post-test for each module and to perform certain hands-on activities (many of these activities, depending on subject area, are team based). Each participant completes a class evaluation at the end of the training event.

Use the following format to cite this article:

PA agricultural rescue training. (2021) Ag Safety and Heatlh eXtension Community of Practice. Retrieved from http://ag-safety.extension.org/pagricultural-rescue-training.

Reviewed and Summarized by:
Linda M. Fetzer, Pennsylvania State University – lmf8@psu.edu
Dave E. Hill, Pennsylvania State University (Has since retired)
Dennis J. Murphy, Pennsylvania State University (Has since retired)
Aaron M. Yoder, University of Nebraska Medical Center – aaron.yoder@unmc.edu

Confined Spaces: Emergencies and Rescue

Use the following format to cite this article:

Confined space: Emergencies and rescue. (2012) Ag Safety and Health eXtension Community of Practice. Retrieved from https://ag-safety.extension.org/confined-spaces-emergencies-and-rescue/.

Entering a confined-space manure storage area can be deadly. Farm and ranch managers, family members, and employees must have a complete understanding of what to do in the event of a confined-space emergency and ways to avoid such an incident.

If you find a victim unresponsive in a manure storage area, immediately call 911. Inform the operator that the incident involves a person in a confined-space manure storage area so that the appropriate emergency response personnel can be dispatched to the scene. Emergency responders trained in confined-space rescue will be equipped with the necessary rescue apparatus and gas detection equipment. Do not enter the manure storage area under any circumstances.

While waiting for an emergency response team, ventilate the area by blowing fresh air into the space, moving the toxic air away from the victim. Keep a ventilation fan readily available specifically for such emergencies. When using a fan, be aware of the following recommendations:

  • Do not use typical barn or home fans to ventilate manure-storage areas because they may emit sparks from static electricity or an electrical short. If flammable methane gas has collected in the storage area, a spark could cause a fire.
  • Never attempt to get fresh air closer to the victim by lowering a fan into the confined space.
  • Make sure that the ventilation fan does not blow the manure gases back toward you, affecting your breathable air.

Preventing Confined-Space Manure Storage Emergencies

Take the following precautions on your farm or ranch to reduce the risk of a confined-space manure storage emergency:

  • Warning Signs: Post warning signs (example is shown below) about the risks of confined spaces and gas hazards at the openings to manure storage areas. Include warnings against walking or driving on crusted manure surfaces.

    Confined Space Sign

(Source: Pennsylvania State University. Agricultural Safety and Health)

  • Limited Access: Limit access to manure storage areas to authorized personnel. Take these specific steps to keep people away from manure storage areas:
    • Equip exterior ladders with locking mechanisms.
    • Remove temporary-access ladders from areas surrounding aboveground tanks.
    • When manure storage areas are open, place barricades at the openings of storage areas.
    • Install and maintain fencing around uncovered ground-level storage areas such as manure ponds or lagoons.
  • Education: Educate employees, family members, and visitors about the hazards associated with manure storage in confined spaces.
  • Entry Plan: Prepare and document an entry plan for entering confined spaces where manure is stored. Review the entry plan annually with all employees and family members. The entry plan should include specific physical details about the confined space, descriptions of potential hazards, reasons for entry, procedures for entry, and procedures to follow during emergencies.
  • Two-Person Minimum: Require that two people be present for any confined-space entry and that both individuals be trained in entry and rescue techniques. The person outside the manure storage area should maintain verbal and visual contact with the person inside the confined space at all times. The person outside the storage area should be available to summon help and to implement the rescue and retrieval system if necessary. This person should not enter the manure storage area, even in the event of an emergency.
  • Gas Detection: Use gas detection equipment to monitor oxygen levels and levels of explosive and toxic gases in the confined space.

Gas Monitor

(Source: Pennsylvania State University. Agricultural Safety and Health)

  • Ventilation: Prior to entry, ventilate the confined-space manure storage area for a minimum of 15 minutes and continue ventilation during entry and occupancy. A positive-pressure ventilation system is recommended because of the reduced risk of fire or explosion.
  • Body Harness: Require that the person entering the manure storage area carry a portable gas monitor and wear an adjustable body harness with a lifeline attached to a rescue and retrieval system. A typical rescue and retrieval system uses a tripod device equipped with a winch to limit a person’s fall and retrieve a person who has been incapacitated.
  • Power-Source Lockout: To reduce the risk of stray electricity, prior to entry, lock out all power sources in the confined-space manure storage area other than the positive-pressure ventilation system.

Additional Safety Recommendations

  • Remember that youth under the age of 16 are prohibited from working in confined spaces.
  • Provide training about the hazards associated with confined-space manure storage to every person working on, living on, or visiting the farm or ranch.
  • Ventilate manure storage areas appropriately to increase oxygen and decrease explosive and toxic manure gases.
  • Remove personnel and animals from the confinement building during manure storage agitation or pumping. If you are unable to remove the animals, maximize ventilation and begin agitating very slowly while monitoring the animals for abnormal behavior.
  • Prohibit smoking in and around manure storage areas.
  • Operate manure agitators below the surface of liquid manure to reduce the release of manure gases.
  • Leave 1 to 2 cu. ft. of space above the manure to contain released gases. If you are unable to leave the recommended space, lower the manure level prior to agitation.

Use the following format to cite this article:

Confined space: Emergencies and rescue. (2012) Farm and Ranch eXtension in Safety and Health (FReSH) Community of Practice. Retrieved from https://ag-safety.extension.org/confined-spaces-emergencies-and-rescue/.

Sources

Hallman, E. & Aldrich, B. (2007) Hydrogen sulfide in manure handling systems: Health and safety issues. Cornell University Manure Management Program. Retrieved from https://ecommons.cornell.edu/handle/1813/60609.

Hill, D., Murphy, D., Steel, J., & Manbeck, H. (2011) Confined space manure storage emergencies. Penn State Extension. Retrieved from https://extension.psu.edu/confined-space-manure-storage-emergencies.

Ogejo, J. (2009) Poultry and livestock manure storage: Management and safety. Virginia Cooperative Extension. Retrieved from https://pubs.ext.vt.edu/442/442-308/442-308.html.

Reviewed and Summarized by:
Linda M. Fetzer, Pennsylvania State University – lmf8@psu.edu
LaMar Grafft, East Carolina University – grafftl@ecu.edu
Davis E. Hill, Pennsylvania State University – (has since retired)
Dennis J. Murphy, Pennsylvania State University – (has since retired)
Aaron M. Yoder, University of Nebraska Medical Center – aaron.yoder@unmc.edu