What is a cow’s flight zone?

If you are planning to move cattle, you must first understand their “flight zone.” Understanding a cow’s flight zone will reduce stress on the animal and reduce the likelihood of injuries to you and the animal. A cow’s flight zone is similar to your personal space—it is the distance from an animal that a handler must maintain for the animal to feel comfortable. When a person enters the cow’s flight zone, the cow will move. A dairy cow that is accustomed to human interaction on a daily basis has a smaller flight zone than a beef animal out on the range (the flight zone of such an animal might be up to 300 ft).

“Point of balance” is a factor related to flight zone, and working with a cow’s point of balance will also help you move a cow more safely. The point of balance is located at the cow’s shoulder. To move a cow forward, you should be positioned behind its shoulder. If you need to move the animal backward, position yourself in front of the shoulder. Whether moving a cow forward or backward, work at the edge of the cow’s flight zone and at angle of 45° to 60° so that you stay within the animal’s field of vision.

For more information about handling beef cattle, click here to view the article “Beef Cattle Handling Safety.” 

Sun Exposure and Agriculture

 
Sun Photo
(Photo Source: Pennsylvania State University Ag Safety & Health)


Use the following format to cite this article:

Sun exposure and agriculture. (2012) Farm and Ranch eXtension in Safety and Health (FReSH) Community of Practice. Retrieved from http://www.extension.org/pages/63042/sun-exposure-and-agriculture.


Farmers and ranchers need to be cautious about their exposure to the ultraviolet rays (UV) of the sun. Skin cancer is the most common type of cancer in the United States and is related to repeated exposure to the sun which causes damaging changes to a person’s skin. The two types of ultraviolet rays most likely to damage a person’s skin and increase the risk for developing skin cancer are Ultraviolet A (UVA) and Ultraviolet B (UVB).

No one is immune to the sun’s UV rays; however, some skin types are more susceptible than others. People with blonde or red hair, fair skin, or freckles tend to get sunburned more quickly than others and should be even more vigilant about protecting themselves from the sun.

Skin damage builds up over the years, and once the damage has occurred, it cannot be reversed.


Risks of Sun Exposure

One of the main health concerns of sun exposure is skin cancer. In the United States, one in five people will develop skin cancer. Contact your physician if you notice a difference in your skin or changes in moles regarding asymmetry, border, irregularities, color, or size.

The three main types of skin cancer are basal, squamous, and melanoma. Basal and squamous cancers are typically associated with long-term exposure to the sun but are seldom fatal. Melanoma can be fatal if not diagnosed and treated early and can affect people of all ages. When examining your skin for melanoma, look for changes in the size, shape, and color of existing moles and discolored patches of skin that may start small and grow.   


Recommendations

The following recommendations can reduce an agricultural producer’s risk of sun exposure, skin cancer, and other sun-induced conditions:

Sun Intensity – Exposure to harmful ultraviolet rays is most intense between 10:00 a.m. and 4:00 p.m. When possible, avoid working in direct sunlight during this time. If you must be in the sun during these hours, take shade breaks to reduce exposure, drink plenty of water, and reapply sunscreen at least every two hours.

Sunscreen – Sunscreens have one or more chemicals that absorb or disperse ultraviolet rays. Sun protection factor (SPF) is a numerical rating that indicates a specific amount of protection. You should wear a sunscreen with a minimum SPF of 15, but those with fair skin should use an SPF of 30 or higher. Due to exposure to water, weather, and perspiration, you should reapply sunscreen at least every two hours. 

Clothing – Long-sleeved shirts and long pants provide protection from the sun’s rays. Darker clothing with a tight weave provides more protection from the sun than light-colored, loose-fitting clothing. Special SPF or UV-resistant clothing is available to reduce exposing your skin to the UV rays.

Hats – When it comes to sun protection, not all hats are created equal. You should wear a wide-brimmed (minimum of three inches wide) hat with flaps or drapes to provide sun protection for your eyes, ears, and neck.  

Wide Brimmed Hat

Wide Brimmed Hat. Photo Souce: Penn State University

Sunglasses – To reduce the risk of eye damage from the sun, wear sunglasses with UV protection. When purchasing UV-blocking sunglasses, look for labels that indicate “UV absorption” or “meets ANSI UV requirements.” Long-term exposure of your eyes to the sun could cause pterygium (thickening of the outer coating of the eye), cataracts, and possibly macular degeneration.

Medications – Check both your prescription and over-the-counter medications concerning whether the medication creates sensitivity to sunlight, and discuss options with your physician.

Diseases – Sun exposure can be problematic for people with certain types of diseases or health conditions.  Discuss your medical condition and sun exposure with your physician.


Use the following format to cite this article:

Sun exposure and agriculture. (2012) Farm and Ranch eXtension in Safety and Health (FReSH) Community of Practice. Retrieved from http://www.extension.org/pages/63042/sun-exposure-and-agriculture.


Citations


Jepsen, S. D. & Suchey, J. (2015) Sun exposure (Protect your skin). Ohio State University Extension. Retrieved from http://ohioline.osu.edu/factsheet/aex-79018.

Schwab, C. & Stone, J. (2002) Remember sun safety in the field. Iowa State University Extension and Outreach. Retrieved from https://store.extension.iastate.edu/ItemDetail.aspx?ProductID=4993.

UV radiation. (2010). Centers for Disease Control and Prevention.  Retrieved from http://www.cdc.gov/niosh/topics/uvradiation/.  


Reviewed and Summarized by:
Linda M. Fetzer, Pennsylvania State University – lmf8@psu.edu
Karen Funkenbusch – University of Missouri – funkenbuschk@missouri.edu
Dennis J. Murphy, Pennsylvania State University (Has since retired)
Charles V. Schwab, Iowa State University – cvschwab@iastate.edu
Aaron M. Yoder, University of Nebraska Medical Center – aaron.yoder@unmc.edu
 

Use of Hand Signals in Production Agriculture


Use the following format to cite this article:

Use of hand signals in production agriculture. (2012) Agricultural Safety and Health eXtension Community of Practice. Retrieved from https://ag-safety.extension.org/use-of-hand-signals-in-production-agriculture/.

Hand signals are an important means of communication on farms and ranches when noise levels are too loud or the distance is too far between workers to effectively use verbal communication. The American Society of Agricultural Engineers (ASAE) developed a standardized set of 11 hand signals for use in production agriculture to enhance communication and promote safety (ASABE, 2011). With the exception of one hand signal, all of the signals can be completed with the use of one arm.

Hand signals can be used to effectively communicate instructions, save time, and lower the risk of an injury or death. As a farmer or rancher, you need to understand the hand signals and teach the hand signals to those involved in your operation. The ASAE hand signals are shown below:

This far to go (ASAE Figure 1)

ASABE Hand Signal

From ANSI/ASAE Standard S351 FEB1972 (R2011): Hand signals for use in agriculture. Copyright American Society of Agricultural and Biological Engineers. Used with permission.

Place palms at ear level facing your head and move inward to show the remaining distance to go.

Come to me (ASAE Figure 2)


ASABE Hand Signal Fig 2

From ANSI/ASAE Standard S351 FEB1972 (R2011): Hand signals for use in agriculture. Copyright American Society of Agricultural and Biological Engineers. Used with permission.


Raise your arm vertically over your head, palm out to the front, and rotate in large horizontal circles.

Move toward me (ASAE Figure 3)


ASABE Hand Signal Fig 3

From ANSI/ASAE Standard S351 FEB1972 (R2011): Hand signals for use in agriculture. Copyright American Society of Agricultural and Biological Engineers. Used with permission.


Point toward the person, vehicle, or unit.  Signal by holding arm horizontally to the front, palm up, and motiong toward the body.

Move out (ASAE Figure 4)


ASABE Hand Signal Fig 4

From ANSI/ASAE Standard S351 FEB1972 (R2011): Hand signals for use in agriculture. Copyright American Society of Agricultural and Biological Engineers. Used with permission.


Face the desired direction of movement; hold the arm extended to the rear: then swing the arm overhead and forward in the direction of desired movement until the arm is horizontal with palm down.

Stop (ASAE Figure 5)


ASABE Hand Signal Fig 5

From ANSI/ASAE Standard S351 FEB1972 (R2011): Hand signals for use in agriculture. Copyright American Society of Agricultural and Biological Engineers. Used with permission.


Raise the hand upward to the full extent of the arm, palm to the front. Hold that position until the signal is understood.

Increase speed (ASAE Figure 6)


ASABE Hand Signal Fig 6

From ANSI/ASAE Standard S351 FEB1972 (R2011): Hand signals for use in agriculture. Copyright American Society of Agricultural and Biological Engineers. Used with permission.


Raise the hand to the shoulder, fist closed; thrust the fist upward to the full extent of the arm and back to the shoulder rapidly several times.

Decrease speed (ASAE Figure 7)


ASABE Hand Signal Fig 7

From ANSI/ASAE Standard S351 FEB1972 (R2011): Hand signals for use in agriculture. Copyright American Society of Agricultural and Biological Engineers. Used with permission.


Extend arm horizontally sideward with palm down; wave arm downward at 45 degrees minimum several times.  Do not move your arm above horizontal.

Start the engine (ASAE Figure 8)

ASABE Hand Signal Fig 8

From ANSI/ASAE Standard S351 FEB1972 (R2011): Hand signals for use in agriculture. Copyright American Society of Agricultural and Biological Engineers. Used with permission.

Move arm in circular motion at waist level to simulate cranking engine.

Stop the engine (ASAE Figure 9)

ASABE Hand Signal Fig 9

From ANSI/ASAE Standard S351 FEB1972 (R2011): Hand signals for use in agriculture. Copyright American Society of Agricultural and Biological Engineers. Used with permission.

Draw right hand, palm down, across your neck in a “throat-cutting” motion left to right.

Lower equipment (ASAE Figure 10)

ASABE Hand Signal Fig 10

From ANSI/ASAE Standard S351 FEB1972 (R2011): Hand signals for use in agriculture. Copyright American Society of Agricultural and Biological Engineers. Used with permission.

Use circular motion with either hand pointing to the ground.

Raise equipment (ASAE Figure 11)

ASABE Hand Signal Fig 11

From ANSI/ASAE Standard S351 FEB1972 (R2011): Hand signals for use in agriculture. Copyright American Society of Agricultural and Biological Engineers. Used with permission.

Make circular motion with either hand at head level.

Resources:

Click HERE for on Hazardous Occupations Safety Training in Agriculture (HOSTA) Task Sheet 2.9 to see diagrams and examples of when to use each of the hand signals.

Use the following format to cite this article:

Use of hand signals in production agriculture. (2012)Agricultural Safety and Health eXtension Community of Practice. Retrieved from https://ag-safety.extension.org/use-of-hand-signals-in-production-agriculture/.

Sources

American Society of Agricultural and Biological Engineers (ASABE). 2011. ANSI/ASAE S351 FEB1972 (R2007), Hand Signals for Use in Agriculture. ASABE Standards 2011. St. Joseph, MI: ASABE.

National safe tractor and machinery operation program: Student manual revised third edition. (2020) Penn State Extension. Not available online.

Johnson, S. & Murphy, D. (2008) Agricultural hand signals. Pennsylvania State University College of Agricultural Sciences Cooperative Extension. Retrieved from http://extension.psu.edu/business/ag-safety/vehicles-and-machinery/gener….

Reviewed and Summarized by:
Linda M. Fetzer, Pennsylvania State University – lmf8@psu.edu
Dennis J. Murphy, Pennsylvania State University (has since retired)
Charles V. Schwab, Iowa State University (has since retired)
 Aaron M. Yoder, University of Nebraska Medical Center – aaron.yoder@unmc.edu

Youth ATV Safety

ATV Safety Course Photo

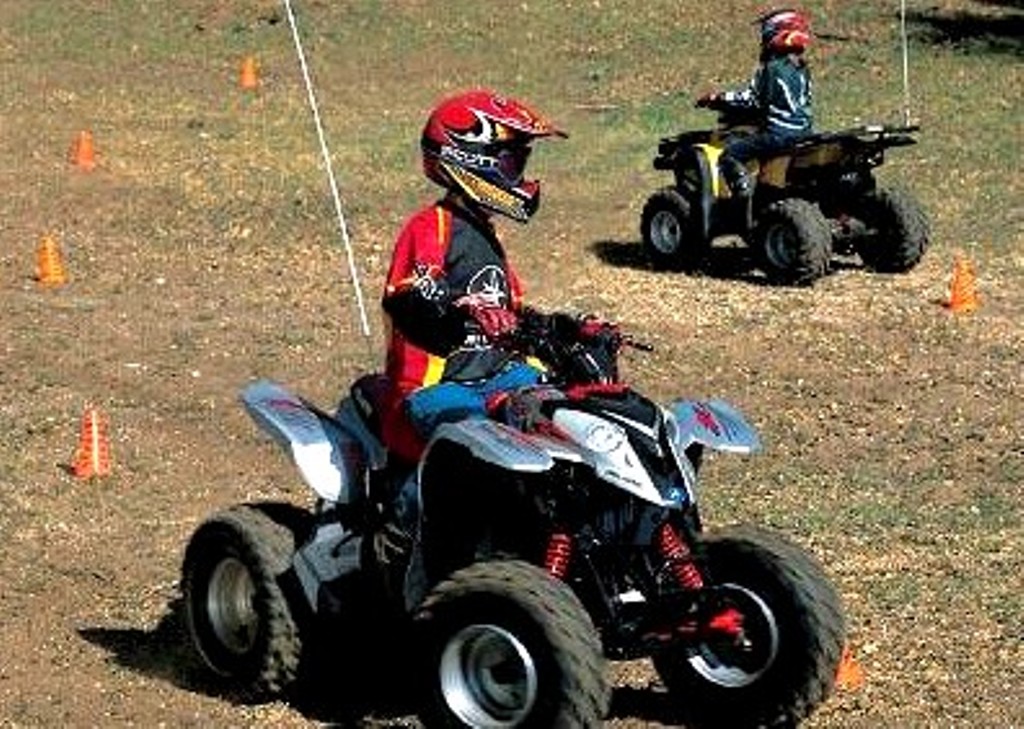
(Photo Source: Specialty Vehicle Institute of America, ATV Safety Institute)

Use the following format to cite this article:

Youth ATV safety. (2012) Farm and Ranch eXtension in Safety and Health (FReSH) Community of Practice. Retrieved from http://www.extension.org/pages/62259/youth-atv-safety.


Youth operate all-terrain vehicles (ATVs) on farms and ranches and for recreational use. ATVs can be useful for work and a fun mode of transportation; however, injuries from ATV incidents continue to be problematic for farm and rural youth. In 2008, more than 37,000 youth under the age of 16 were treated in hospital emergency rooms across the country due to ATV-related injuries (Consumer Product Safety Commission).

Many of these incidents can be prevented by evaluating the youth’s readiness to operate an ATV by:

  • identifying the correct size of ATV;
  • using personal protective equipment;
  • giving the youth safety instruction, and
  • providing adult supervision. 

Adult supervision of youth ATV operators is essential to ensure that the youth adheres to rules, wears the proper protective equipment, and correctly operates the ATV. Controls such as throttle limiters, exhaust restrictors, and remote shut-off switches are available to assist adults when regulating beginning ATV operators.

Youth Readiness and Size of ATV

Children under 6 should never be on an ATV, according to the U.S. Consumer Product Safety Commission. Most ATVs are labeled with a recommended age for that model. The recommended ages for Y-6 models (under 70cc engines) are 6 to 11 years old. The Y-12 models (70 to 90 cc engines) are 12 to 15 years old. However, some states many have specific rules regarding allowable age for operation of ATVs, so it is important to check your state for rules, and while the actual age is the easiest to identify, it should not be the only factor in determine when youth can ride.

Children develop at different rates, so consider each child’s cognitive and physical development when making a decision about their ability to operate an ATV. Cognitive and emotional development is related to the youth’s reasoning ability, memory, discipline, focus, and decision-making skills. Do not overestimate your child’s abilities when it comes to making decisions that will affect his safety. When assessing your child’s cognitive development, determine her level of discipline and her understanding of cause and effect. Be sure that your child understands that if his behavior is unsafe or reckless, the consequence may be an injury or death. Discuss safety scenarios with your youth to ensure that he can provide sensible and safe reactions to the situation.

Physical development includes the youth’s size, strength, visual acuity, and coordination. The following are a few measures you can take to determine if your child is physically ready to operate an ATV:

  • If your child stands on the footrests of the ATV with his hands on the handle bar, are there at least 3 inches of clearance between the ATV seat and the seat of the child’s pants?
  • Can your child operate the throttle and brake lever with one hand?
  • Can your child shift the weight of the ATV side to side by shifting her weight? 

Youth should only operate a four-wheeled ATV because these are more stable and present less risk for a side overturn compared to a three-wheeled ATV.

For beginning riders, choose an ATV with a single speed automatic transmission, and do not equip the ATV with a carrier rack. A load on a carrier rack can shift and possibly alter the ATV’s center of gravity and decrease its stability. There is only one seat for the operator; therefore, passengers are not permitted on an ATV. The following chart is a guideline for the most appropriate-sized ATV engine compared to the youth’s age.  

Figure 1: Operator Age and ATV Engine Size
Age of Operator ATV Engine Size
Under 6 years of age No operation recommended
Age 6 to 11 Under 70cc
Age 12 to 15 70 – 90cc
16 years and older Over 90cc

Different Sized ATVs

Different Sized ATVs. Photo Source: Penn State Ag Safety & Health

(Left to right: 700cc, 90cc, and 50cc. Photo Source: Pennsylvania State University. Agricultural Safety and Health)


Protective Gear for ATV Operators

The most important piece of personal protective equipment for an operator is a helmet approved for ATV use.  Helmets should be the correct size for the operator and approved for ATV use by the American National Standards Institute (ANSI), U.S. Department of Transportation, or the Snell Memorial Foundation to ensure that it has been safety tested. If the helmet is not equipped with a face shield, wear an ANSI-approved pair of goggles or glasses with hard-coated polycarbonate lenses. When operating an ATV, the child should also wear gloves, boots, long-sleeved shirt or jacket, and long pants.

Maintenance, Specifications, and Operation

Teach your youth the location of the following ATV parts: parking brake, brakes, throttle, engine stop switch, and shift lever (if equipped). Prior to operating the ATV, follow these steps:

  • Check the air pressure in the tires, controls and cables, ignition switch, and oil and fuel levels.
  • Lubricate chains and/or drive-shaft chassis. 
  • Make sure that all nuts and bolts are tightly secured. 

Teach youth the acronym BONE-C which outlines the following steps to properly start an ATV:

  1. BBrake – Make sure the parking brake is set.
  2. OOn – The ignition and fuel are on.
  3. NNeutral – ATV should be started in neutral (if equipped)
  4. EEngine – The stop switch should be in the run or start position.
  5. CChoke – Choke should be on when starting a cold engine. 

Safety Instruction

Youth should learn to safely operate an ATV in an approved safety training program. 

Click HERE to be directed to ATVSafety.gov to do an online ATV safety training. ATVSafety.gov provides safety information, legislation regarding ATV use, state-specific information about regulations, and contact information for ATV safety training for adults and teens.  

Click HERE to be directed to the ATV Safety Institute for more information about ATV safety and safety training classes in your area.

Click HERE to view a below from the ATV Safety Institute to learn more about their ATV safety training classes.

Additional Safety Recommendations

  • Check your riding area to make sure it is free from hazards such as rocks, stumps, branches, and fences.
  • Know and obey the laws in your area related to ATV operation.
  • Ask permission before riding on private property.
  • Use lights, reflectors, and flags to increase the ATV’s visibility.
  • Do not show off, perform stunts, or speed.
  • ATV tires are not designed for road travel so avoid public roads and paved surfaces because road travel affects the handling and control of the ATV. 
  • Keep the feet on the footrests at all times.
  • Remember that certain ATV parts such as the engine, exhaust pipe, and muffler are hot and can cause burns.
  • Keep the hands and feet away from all moving parts on the ATV.
  • Maintain proper riding posture to help properly operate the controls.   

Resources

  • Click HERE to be directed to the Youth Agricultural Work Guidelines that provides questions designed to help you determine whether your child is ready to operate an ATV or UTV and have a positive agricultural work experience. 
  • Click HERE to be directed to the Children’s Safety Network’s publication titled ‘Focus on All-Terrain Vehicle Safety: Resource Guide 2012’.


Use the following format to cite this article:

Youth ATV safety. (2012) Farm and Ranch eXtension in Safety and Health (FReSH) Community of Practice. Retrieved from http://www.extension.org/pages/62259/youth-atv-safety.


Sources

2008 annual report of ATV-related deaths and injuries. (2010). Consumer Product Safety Commission. Retrieved from https://www.cpsc.gov/s3fs-public/pdfs/atv2008.pdf.

Youth agricultural work guidelines. (2017)National Children’s Center for Rural and Agricultural Health and Safety. Retrieved from https://cultivatesafety.org/safety-guidelines-search/?category=familyyouth.

Murphy, D. & Harshman, W. (2005). ATVs and youth: Matching children and vehicles. Penn State College of Agricultural Sciences Cooperative Extension. Retrieved from https://extension.psu.edu/atvs-and-youth-matching-children-and-vehicles.

Parents, youngsters, and all-terrain vehicles (2010) ATV Safety Institute. Retrieved from https://www.cohv.ca/wp-content/uploads/2014/11/parents-youngsters-atvs-2….

Schwab, C., Miller, L. & Satre, S. (2008) ATV safety for farm work, recreation. Iowa State University Extension and Outreach Safe Farm. Retrieved from https://store.extension.iastate.edu/ItemDetail.aspx?ProductID=5065


Reviewed and Summarized by:
Linda M. Fetzer, Pennsylvania State University – lmf8@psu.edu
S. Dee Jepson, Ohio State University – jepsen.4@osu.edu 
Dennis J. Murphy, Pennsylvania State University – (Has since retired)
Michael Pate, Pennsylvania State University – mlp79@psu.edu
Aaron M. Yoder, University of Nebraska Medical Center – aaron.yoder@unmc.edu