Lightning Safety

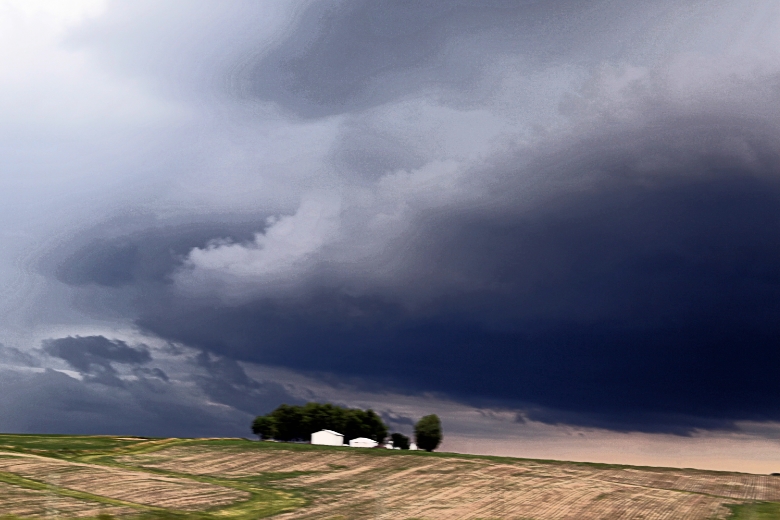
Photo of storm clouds approaching

Photos provided by the Central States Center for Agricultural Safety and Health (CS-CASH)


Lightning and thunderstorms typically occur during the spring and summer months. As human beings, we are great conductors of lightning because approximately 65 percent of the human body consists of salt and water. Lightning can cause injury or death to humans and animals, either by direct strike or transmission indirectly to and through the body. Also, it can cause structure fires.

Cloud-to-ground lightning can cause injuries by direct or indirect means because the current can branch off to a person from a nearby tree, fence, or other tall object. Lightning flashes can send a current through the ground to a person after hitting a nearby object, such as a tree. Additionally, injuries or death can occur due to fires or falling objects caused by a lightning strike.

Awareness and Preparation

National Oceanic and Atmospheric Administration (NOAA) Weather Radio and local radio/television stations are the best sources for the latest forecasts and emergency updates in your area. Remember that a thunderstorm watch means that storms are possible whereas a thunderstorm warning means that severe weather has been reported by spotters or radar in your area. Even though it is not possible to have lightning without thunder, there are times when you cannot distinctively hear the thunder. When this happens, typically during the summer months, the lightning you see is called heat lightning. The term dry lightning refers to lightning that occurs without rain. This type of lightning can cause forest fires.

In preparation for thunder and lightning storms, you and your family should take the following actions:

  • Choose a place in the house where family members will meet in the event of a storm.
  • Make a list of specific items that need to be brought inside during a storm.
  • Keep trees and shrubbery trimmed and remove debris from around buildings to reduce the potential that items (for example, weak tree limbs) will become projectiles.
  • Ensure that you have a place where your animals can go to be protected.
  • Consider installing permanent shutters that can be closed easily and quickly for better protection.
  • Install lightning rods on your home, barn, and other structures that house animals. Also, install a lightning arrestor or diverter on any electric fence.

When and Where to Seek Shelter

The National Weather Service recommends using the 30/30 rule to know when to move to safety and when to return to your activities. If lightning is within six miles, locate a safe place and stay there until no lightning has been seen nor thunder heard for 30 minutes. The “flash to bang” count can determine the distance of the lightning. When you see lightning, start counting seconds (one one-thousand, two one-thousand, and so on) and stop when you hear the thunder. Every five seconds equals a mile, so move to safety if the count is less than 30 seconds.

Choose your safe place wisely. A fully enclosed metal vehicle or building is a safe shelter if the outer metal shield is not compromised. This means you should keep windows closed; avoid objects that penetrate from the outside to the inside; and in a vehicle, do not touch external objects such as door handles or radio knobs.  In a lightning storm, avoid water, high and open ground, metal spaces, canopies, picnic or rain shelters, trees, and electrical/electronic equipment. If you are in a structure that has curtains or blinds over windows, close them to prevent glass shards from flying into the structure from a broken window.

If you cannot find a safe shelter, place yourself as low as possible to the ground without lying on the ground. Seek low ground, such as a ditch, or crouch down with your feet together and your hands over your ears to protect your hearing.

During a lightning storm, take the following precautions:

  • Do not hold anything that can conduct electricity, such as a shovel, a hoe, or a golf club.
  • Do not operate farm equipment.
  • Avoid water! Do not take a bath or a shower or run water for any purpose (for example, to wash dishes). If you are swimming or boating, get out of the water.
  • Protect your electronics and electrical items from lightning strikes and power surges by unplugging televisions, computers, and other valuable appliances.
  • Avoid electric fences, clotheslines, metal pipes, rails, telephone poles, and other conductors.

Fires and Entrapments due to Lightning

An electrical fire can occur when an appliance or a tool catches on fire. If possible, unplug the appliance from the outlet; however, if doing so places you in danger, turn off the current at the fuse box. Use an ABC or BC fire extinguisher on an electrical fire, and remember never to pour water on an electrical fire. Leave the area, and contact your local fire department if the fire is more serious than a simple appliance fire. If you notice fallen electrical wires, report them immediately to the police or local utility company. If you find someone trapped in a vehicle by fallen wires, tell the person to stay in the vehicle without touching any metal parts of the car while you go for help.

Injury Types and First Aid

Most lightning strike victims survive, but common injuries include burns, broken bones, heart attacks, and neurological damage. Short-term effects of lightning strike include memory loss, chronic headaches, ringing in the ears, fatigue, personality changes, muscle spasms, joint stiffness, numbness, sleep difficulties, and dizziness. Additional injuries can be caused by fires or objects that fall after being struck by lightning.

First aid needs to be started immediately after a lightning strike. If the person is conscious, check his or her breathing and pulse. If there is no pulse, begin cardiopulmonary resuscitation (CPR). Check the victim for additional injuries, such as fractures, but do not move the person if you suspect a spinal injury. If the victim sustained an electrical burn, cover the burned area with a dry, sterile dressing. Remember to look for multiple burn areas because separate burned areas may exist where the current entered and exited the victim’s body. Also look for burned areas on the person’s extremities (fingers and toes) and on areas next to buckles or jewelry. Contact your local emergency responders. Even if a person does not appear to be injured, he or she still should be seen by a medical professional.

Resources

Click here for more information about personal lightning safety from the National Lightning Safety Institute.

Click here for more information about NOAA Weather Radio.

Click here for information about lightning safety for outdoor workers from the National Lightning Safety Institute.

Click the link below for more detailed information about the related topic.

Lightning Protection Systems


Sources

Cyr, D. and Johnson, S. (2003) Lightning safety. University of Maine Cooperative Extension. Retrieved from http://umaine.edu/publications/2315e/.

Kithil, R. (n.d.) Decision tree for personal lightning safety. National Lightning Safety Institute. Retrieved from http://www.lightningsafety.com/nlsi_pls/decision_tree_people.html.

Thunderstorm safety. (n.d.) American Red Cross. Retrieved from http://www.redcross.org/prepare/disaster/thunderstorm.

Thunderstorm safety checklist. (2009) American Red Cross. Retrieved from https://www.redcross.org/get-help/how-to-prepare-for-emergencies/types-o….

 
Reviewed and Summarized by:
Linda M. Fetzer, Pennsylvania State University – lmf8@psu.edu
William C. Harshman, Pennsylvania State University (Has since retired)
Tom Karsky, University of Idaho (Has since retired)
Dennis J. Murphy, Pennsylvania State University (Has since retired)
Aaron M. Yoder, University of Nebraska Medical Center – aaron.yoder@unmc.edu
 

SAY Project Background


Safety in Agriculture for Youth logo

SAY Project Logo

Special Note:  The material below represents the original plans for the SAY project as stated in the 2013-15 project proposal.  While much progress has been made toward the original goals and objectives, these and organizational structures shift over time.  To stay abreast of SAY project changes, be sure to look at the annual SAY project reports at the bottom of the SAY Project homepage

Project Vision

The mission of the Safety in Agriculture for Youth project (SAY) is to develop a sustainable and accessible national clearinghouse for agricultural safety and health curriculum for youth. This “national curriculum” is not a curriculum per se but is an umbrella compilation that includes many different curricula, programs, projects, and activities that together have a common purpose of increasing safety and health knowledge and reducing hazard and risk exposure to youth on farms and ranches. Additionally, this national curriculum must be sensitive to all types and scales of production agriculture and all ages and experience levels of target audiences; it must include parents and other educators; it must be culturally appropriate; and it must be usable in both formal and informal educational settings.

Project Goals

The goals of SAY are to coordinate a national curriculum and become a sustainable national clearinghouse by 

  1. connecting and enhancing existing educational resources in this area;
  2. developing a centralized location for relevant training and farm and ranch safety materials for both formal (school) and informal (home and agricultural industry) settings; and
  3. developing a national strategy that would enhance awareness of, access to, and utilization of farm safety materials by youth and adults who instruct and/or work with youth.

Project Objectives

SAY has the following implementation objectives:

  • Formulate the project team and identify and invite organizations to serve on the national steering committee and stakeholder groups.
  • Identify formally all safety and health curricula for agricultural youth that possibly align to current nationally recognized core competencies and learning objectives or outcomes.
  • Establish a protocol for development of a pool of exam items (test questions).
  • Develop and deliver an Occupational Safety and Health Administration (OSHA)-approved, 10-hour, web-based youth agricultural safety and health training course.
  • Develop and deliver an OSHA-approved, 10-hour, traditional (classroom-based and instructor-led) youth agricultural safety and health training course.
  • Establish a risk-assessment protocol for developing supervision strategies and guidelines for formal secondary students’ experiential learning activities (that is, supervised agricultural experiences).
  • Provide, through workshops, access to supervision and safety best practices and risk-assessment protocols.
  • Develop an immersive, 3-D, virtual learning environment, in proof-of-concept form, teaching farm safety hazards to youth ages 13 to 15.
  • Develop a sustainable process that ensures user-friendly access to educational resources and expertise.
  • Develop and implement a national strategy to promote awareness and utilization of youth safety materials by diverse stakeholder audiences.
  • Develop and implement a national strategy to increase use of youth safety materials through eXtension.org/agsafety.

Project Organization Chart

This two-year project began in September 2013 and will use the project team, a national steering committee, and four stakeholder groups (shown below) to complete the stated objectives.

SAY Natl Steering Comm

 
Summarized by:
Linda M. Fetzer, Pennsylvania State University – lmf8@psu.edu
 
Reviewed by:
Dave Hill, Pennsylvania State University – deh27@psu.edu
Dennis J. Murphy, Pennsylvania State University – djm13@psu.edu

Play It Farm Safe: An Online Educational Game

Play it Farm Safety Logo

(Source: University of Vermont Extension)

University of Vermont Extension 4-H has developed an online educational game called “Play It Farm Safe.” The Play It Farm Safe game is a self-paced learning tutorial for youth ages 12 through 15 that addresses the following topics:

  • tractor and machinery safety
  • animal and livestock safety
  • ATV safety
  • woodlot safety
  • general farmstead safety

Modules include educational diagrams, videos, and questions used to reinforce agricultural safety and health topics. Once a participant has completed all the modules, he or she can print and send a form to the University of Vermont for a completion certificate that will be mailed to the user.

Click HERE to visit the Youth Farm Safety Project and access the online training or HERE to view the program flyer. 

In addition to accessing the game, educators will soon be able to download free companion materials from the site. These materials will include game content for pencil and paper and other farm safety activities that align with Common Core Standards and National Agriculture, Food, and Natural Resources Career Cluster Standards.

 
Reviewed and Summarized by:
Linda M. Fetzer, Pennsylvania State University – lmf8@psu.edu
Kristen Mullins, University of Vermont – kristen.mullins@uvm.edu
Dennis J. Murphy, Pennsylvania State University – djm13@psu.edu
Aaron M. Yoder, University of Nebraska Medical Center – aaron.yoder@unmc.edu

Safety and Health Management Planning for General Farmers and Ranchers

Safety and Health Management Manual Cover

(Source: Penn State College of Agricultural Sciences)

Agriculture continues to be one of the most dangerous occupations in the United States. Penn State’s Agricultural Safety and Health Program has developed a best practices manual titled Safety and Health Management Planning for General Farmers and Ranchers. This manual assists farm owners and managers in developing health and safety management plans for their agricultural operations. The following five units of the manual outline the reasons a safety and health plan is needed along with hands-on activities and steps to take to develop a successful safety and health plan:

  1. Establishing Safety Policies and Procedures
  2. Identifying and Assessing Hazards and Risks
  3. Preventing and Controlling Hazards and Risks
  4. Educating and Training Employees
  5. Evaluating Training Programs and Resources

A complete copy of Safety and Health Management Planning for General Farmers and Ranchers is available through Penn State College of Agricultural Sciences Publications

Click HERE for learning objectives and evaluation questions for each unit.

Click HERE for a copy of the Instructor’s Guide to be used in conjunction with Safety and Health Management Planning for Beginning Farmers and Ranchers.


Reviewed and Summarized by:
Linda M. Fetzer, Penn State University – lmf8@psu.edu
Dennis J. Murphy, Penn State University – djm13@psu.edu
Sam Steel, Penn State University (Has since retired)


Overhead Power-Line Safety


Photo of electrical lines at the farm

Photo provided by the Central States Center for Agricultural Safety and Health (CS-CASH)


Use the following format to cite this article:

Overhead power-line safety. (2012) Farm and Ranch eXtension in Safety and Health (FReSH) Community of Practice. Retrieved from http://articles.extension.org/pages/70904/overhead-power-line-safety.

Overhead power lines on a farm or ranch can pose a significant electrocution hazard. Because power lines may have been installed without insulation or the insulation may have worn off due to exposure to weather, you should assume that all power lines are bare. Death from electrocution can occur when a person touches a power line while he or she is also in contact with the ground. When electricity enters something or someone, it takes the easiest and shortest path to electrical ground, the point at which the electricity is absorbed (as in the earth).

There are numerous pieces of equipment on a farm or ranch that, due to their height, can come in contact with overhead power lines:

  • loader tractors 
  • portable grain augers and elevators 
  • dump trucks 
  • cultivators in transport mode
  • irrigation pipes 
  • equipment with antennas 

Specific Risks

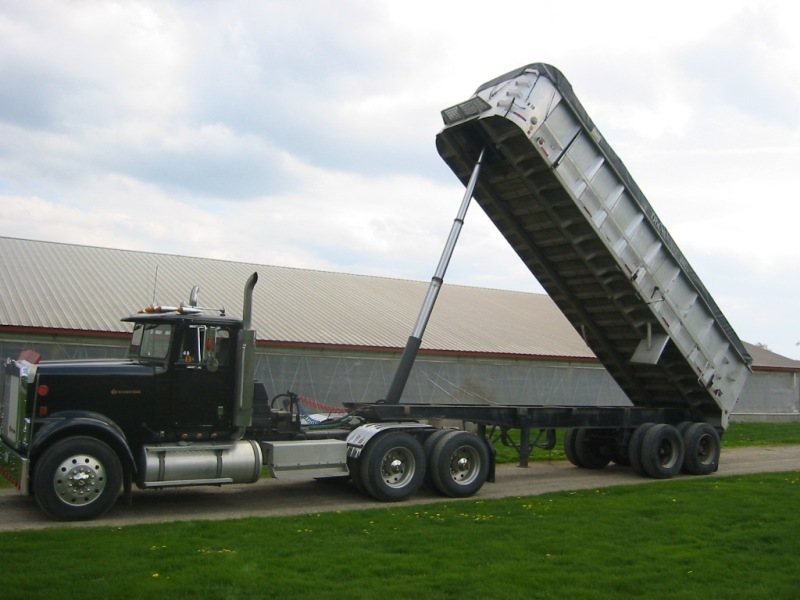
  • Dump trucks: When raised, the bed of a dump truck or trailer can contact overhead power lines. The person operating the dump truck should note the location of power lines before raising the bed and should not move the dump truck or trailer while the bed is in the raised position.

    • Typically, if a raised bed contacts a power line, the operator will not be at risk of electrocution if he or she remains inside the vehicle because the truck’s tires provide insulation. If, however, a person standing on the ground touches the dump truck or trailer while it is in contact with an overhead line, he or she could be electrocuted.
  • Hay: A loader tractor or telescopic loader may be used during hay handling. Because the booms of such vehicles may reach as high as overhead power lines, putting the vehicle at risk of contact, hay should not be stored under power lines.  
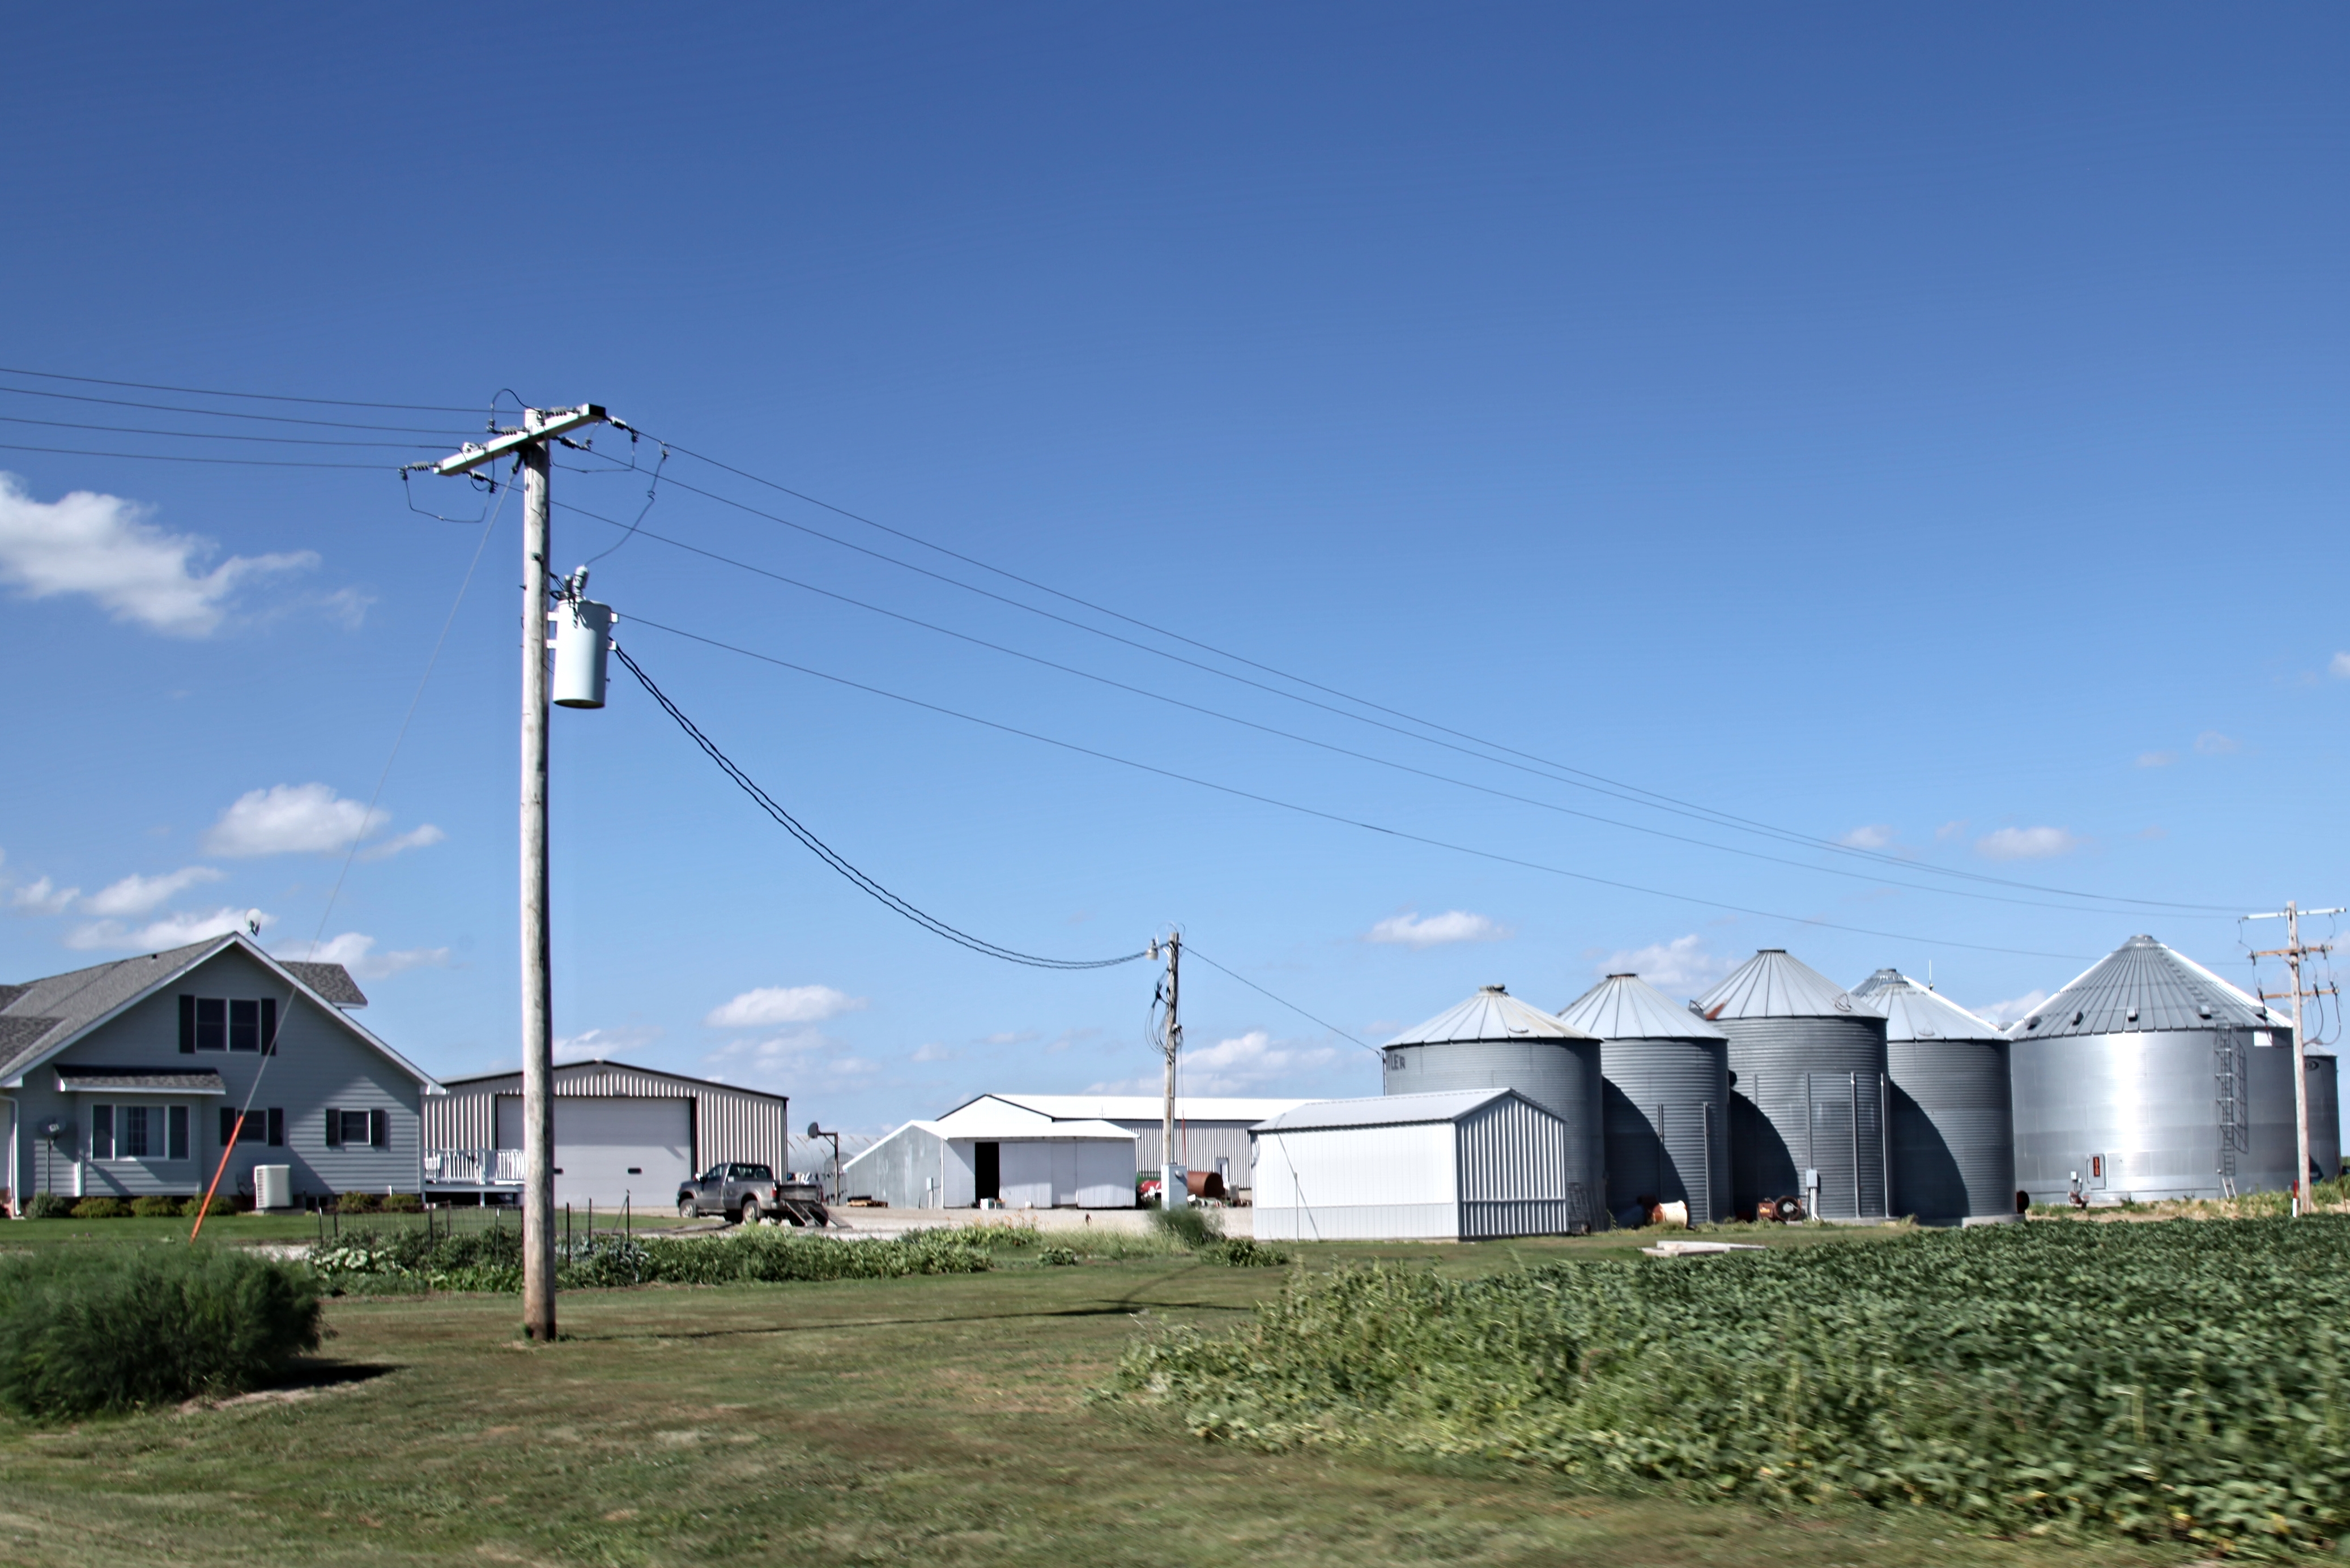
  • Grain bin: Electrocution incidents associated with grain bins occur when augers and/or elevator equipment is used in the vicinity of overhead power lines. The National Electrical Safety Code (NESC) requires that, where a portable auger or filling equipment is used, power lines be at least 18 ft. above the highest point on any grain bin constructed after 1992.

    • Consult a licensed electrician or your local power company for guidance when planning changes to your grain bin operations.
    • Click here for information from the U.S. Department of Labor concerning power line safety and equipment operation.

As a farmer or rancher, you can reduce your risk of electrocution by following these recommendations:

  • Be aware of the location of overhead power lines on your farm, and avoid the risk of electrocution by choosing a route for your equipment that avoids potential contact.
  • Never touch a power line.
  • Contact your local power company if an incident occurs.
  • Never use ladders around power lines.
  • Remember that some equipment may have a higher profile during transport.
  • Maintain a 10 ft. clearance space between the power lines and your equipment. Contact your power company to determine the height of power lines on your farm.
  • If you are in a tractor and come in contact with power lines, remain in the tractor and have someone contact the power company to shut off the power.
    • If you are in a tractor that contacts power lines and you must exit because of an emergency such as a fire, jump out and away from the tractor as far as possible. Never allow any part of your body to touch both the equipment and the ground at the same time. Plan to fall away from the tractor to avoid tripping back into contact with the tractor.
  • Review safety measures with all individuals working on your farm, whether full-time, part-time, seasonal, or voluntary.
  • Remember that even nonmetallic objects such as tree limbs, ropes, and straw can conduct electricity.
Click HERE to view recommendations from SafeElectricity.org regarding electrical safety on agricultural operations.
 

Use the following format to cite this article:

Overhead power-line safety. (2012) Farm and Ranch eXtension in Safety and Health (FReSH) Community of Practice. Retrieved from http://articles.extension.org/pages/70904/overhead-power-line-safety.


Citations

Maintain proper clearance around grain bins. (2010) Power Plus: A Monthly Publication of Midland Power Cooperative. Retrieved from https://www.recc.coop/grain-bin-clearances/.

Sources

Murphy, D. and Harshman, W. (2005) Farm dump truck and trailer safety. Penn State College of Agricultural Sciences Cooperative Extension. Retrieved from https://extension.psu.edu/farm-dump-truck-and-trailer-safety.

Schwab, C. and Miller, L. (2004) Electrocution hazards on the farm. Iowa State University Extension and Outreach. Retrieved from https://store.extension.iastate.edu/ItemDetail.aspx?ProductID=4616.

Reviewed and Summarized by:
Linda M. Fetzer, Pennsylvania State University – lmf8@psu.edu       
William C. Harshman, Pennsylvania State University (Has since retired)
Dennis J. Murphy, Pennsylvania State University (Has since retired)
Charles V. Schwab, Iowa State University  cvschwab@iastate.edu
Aaron M. Yoder, University of Nebraska Medical Center – aaron.yoder@unmc.edu
 

Silo Fire Prevention and Management

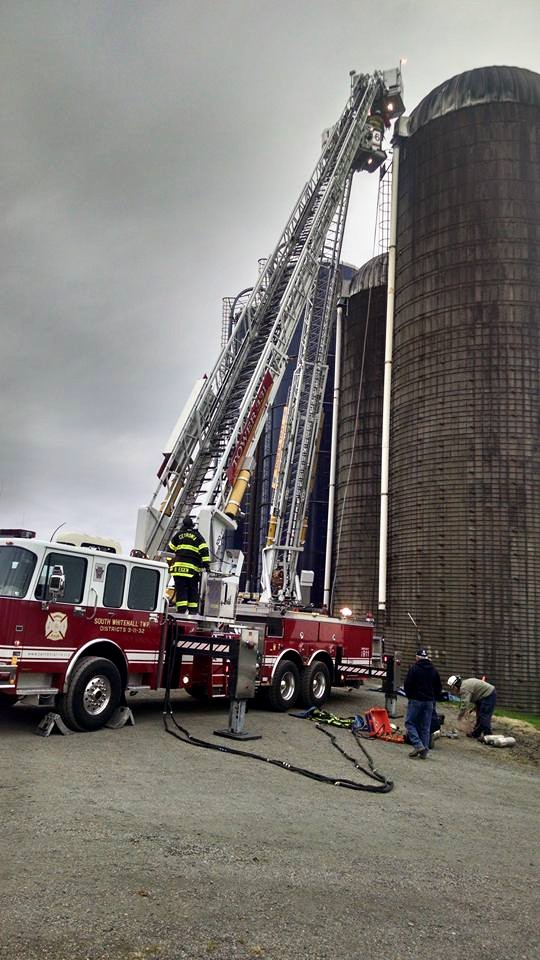
Rescue trucks at silo

Photo source: Penn State University


Use the following format to cite this article:
Silo fire prevention and management. (2015) Farm and Ranch eXtension in Safety and Health (FReSH) Community of Practice. Retrieved from http://articles.extension.org/pages/70637/silo-fire-prevention-and-manag….
 

Because the ingredients needed for a fire to occur are present in silos, agricultural producers who have silos should take steps to minimize the likelihood of silo fires and be prepared to manage silo fires should they occur. Fire prevention steps are similar regardless of what type of silo you have. The approach to managing a fire, however, is based on the type of silo in which the fire is burning.

Ingredients for Fire

Three ingredients are needed for anything to burn: a heat source, air, and fuel.

  • The heat source for a silo fire is bacterial action within the silage. When forage material is cut, bacterial action on the forage begins. This action produces heat until all the oxygen in the pile is consumed. Microorganisms are killed at 250°F–400°F, causing a breakdown in the forage through an oxidation process called pyrolysis. Pyrolysis allows oxygen in the silo to support a smoldering fire that can result in charred cavities in the silage. Once the oxygen is consumed, the fermentation process begins and continues until the forage becomes stable. 
  • The air source for a silo fire includes air that is trapped in chopped forage during harvest and air that blows into the silo. The dryer the material, the more trapped air there is.
  • The fuel source for a silo fire is the silage, although it typically is not a highly effective fuel source because of its moisture content. Even dry silage is too wet to burn quickly.

Causes of Silo Fires

The three main types of upright silos found on farm operations are conventional, oxygen-limiting, and modified oxygen-limiting. Typically, silo fires occur more frequently in conventional silos than in oxygen-limiting silos because oxygen is present in greater amounts in conventional silos. Many silo fires occur in the top layer (approximately the top 10 feet) of dry, loosely packed silage. Such fires can be the result of an overheating unloader motor but more often are caused by spontaneous combustion. Spontaneous combustion can occur when new silage having a too-low moisture content (less than 45%) is placed in the silo, when fresh silage is placed on top of old silage, or when the silo has poorly maintained doors and walls. Putting new silage on top of old silage is especially risky if the old silage is too dry. The dryer the material is, the more air that will be trapped when fresh, wetter material is placed on top of it. That trapped air can allow excessive heating and support a smoldering fire.

A silo fire can start from a source outside the silo as well. The two most common examples of these types of fires are a fire in the chute from a shorted-out electrical wire or a fire from an adjacent barn fire.

Prevention of Silo Fires

Prevention of silo fires involves performing proper maintenance on silos and unloaders and taking appropriate steps when harvesting and storing forages.

Silo and Unloader Maintenance

When a silo is empty, inspect the silo walls (especially the lower 10–15 inches), the silo doors, and the unloader system. Make any necessary repairs. If you have an oxygen-limiting silo, pressure-test it on a regular basis (at least once every other year, preferably when empty). If air is allowed to leak into an oxygen-limiting silo, forage quality can decline, and the chance of a fire developing increases. Many fires have started in oxygen-limiting silos that have been unused for several years but not emptied.

For the unloader system, examine belts, bearings, wiring, and the motor. Lubricate the lift cables, and immediately replace any lift cable showing signs of kinks, cuts, or corrosion. Check for damaged insulation or terminals on the unloader power cable, and repair or replace damaged materials as needed.

Harvesting and Storage Recommendations

Implementing the following steps for harvesting and storing forages will decrease the risk of a silo fire occurring:

  1. Minimize drying time to reduce respiration.
  2. Chop forage at the correct theoretical length cut (TLC). The TLC for hay crop silage is 3/8 inch; the TLC for corn silage is 1/4 inch. Follow the silo manufacturer’s recommendations.
  3. Ensile at 30%–50% dry matter content (i.e., 50%–70% moisture content), based on the silo manufacturer’s recommendations. Using this approach will optimize fermentation.
  4. Leave the silo sealed for at least 14 days to allow complete fermentation to occur.
  5. Unload 2–6 inches per day, and maintain a smooth surface. Using this unloading schedule will help you stay ahead of any spoilage. Spoilage is caused by the bacterial action that can cause heating.
  6. Discard deteriorated silage. Performing this step will help eliminate a fuel source for potential fires and minimize animal health problems.

Management of Silo Fires

Managing silo fires involves monitoring silage to detect a fire early, taking the proper steps when you suspect or discover that a fire is burning, and understanding how fires in different types of silos are extinguished.

Monitoring of Silage

Silage is costly to replace, so one of the main goals of managing a silo fire is to locate the fire and control the area so that only a minimum amount of silage is affected. The first step in managing a silo fire is early detection, so monitor a silo for three weeks postharvest. This length of time is the critical period for fermentation and heating to occur. Because silage burns slowly, detecting a fire early allows you time to evaluate your options and develop a plan for addressing the fire.

Response to the Presence of a Fire

If you suspect or discover a silo fire, contact your local fire department immediately. A silo is a confined space, and firefighters are obligated to follow the US Department of Labor, Occupational Safety and Health Administration (OSHA) Confined Space Standard for entry into a silo. When you contact the fire department, indicate the type of fire so that the fire department can dispatch the correct personnel and equipment (e.g., thermal imaging camera, infrared heat gun, self-contained breathing apparatus).

Wait for the fire service personnel to arrive. Do not enter the silo or climb the chute because unknown factors, such as fire gases or burning embers falling down the chute, may exist. Only rescue personnel with self-contained breathing apparatuses or supplied-air respirators should enter an upright silo because of toxic gases that can be present due to the fermentation process or the fire. The most typical gases in silos include carbon monoxide, carbon dioxide, nitric oxide, nitrogen dioxide, and nitrogen tetroxide. Additional gases can be present due to the burning of substances such as silo liners and epoxy coatings.

While waiting for fire service personnel to arrive on the scene, take the following steps:

  1. Close the bottom of the chute to reduce airflow that may be fanning the fire. Use sheet metal or another noncombustible material to close the chute.
  2. Remove all livestock from any exposed or adjacent buildings.
  3. Spray water to wet down the area around the silo chute to prevent the fire from spreading.
  4. Place noncombustible shields (metal siding, etc.) over any openings in the silo or chute to prevent sparks and embers from flying into or onto other buildings.

Fire Management Approaches for Various Silo Types

It is important to understand how silo fires are managed in various silo types. A fire in a conventional silo will not burn out; instead, it must be extinguished. A fire in oxygen-limiting silo may be managed so that it burns out, or it may have to be extinguished. To extinguish a silo fire, it is necessary to eliminate one of the ingredients needed for fire to occur. Trained fire service personnel are needed to extinguish a fire in any type of silo.

Conventional Silo

Because a conventional silo is not airtight, fire service personnel cannot smother the fire by eliminating the air source. The best approach is to locate the heat source and remove it. If possible, fire service personnel should avoid flooding the silo with water for the following reasons: doing so could ruin good feed; it is difficult to unload wet silage with an unloader; water can damage the silo; and the introduction of water can actually cause additional fires in the silo.

Oxygen-Limiting Silo

With proper management, you may be able to allow a fire in an oxygen-limiting silo to burn out. To reduce any additional air from entering the silo, close the top hatch cover (without latching it) and the bottom unloading door. CAUTION If the silo is heavily smoking or rumbling (vibrating), do not attempt to close the top hatch; rather stay off the silo! The assumption is that after you close the top hatch cover and bottom unloading door, no air will go into the silo, so the fire eventually will use up the residual air in the silo and burn out over time. However, this process can take up to three weeks. If this approach does not work, trained personnel—usually representatives of the silo manufacturer/dealer—can inject carbon dioxide or liquid nitrogen into the silo, causing any oxygen trapped by the silage to be consumed and allowing the fire to burn out.

A concern related to a fire in an oxygen-limiting silo is the potential buildup of confined gases within the silo. Through pyrolysis, a smoldering fire will produce large quantities of carbon monoxide and other products that can result in an explosion when combined with air from outside the silo. Consequently, you should do nothing that will cause air to go into the silo. For example, do not add water or foam or open any portals into the silo.

Modified Oxygen-Limiting Silo

For fire management purposes, you can treat an oxygen-limiting silo that has been modified through the installation of a top unloader the same way as a nonmodified oxygen-limiting silo, at least initially. However, in spite of such modification, these structures are still airtight enough to allow for a dangerous buildup of carbon monoxide in a smoldering fire. In more than one case, an explosion has occurred during firefighting operations involving a modified oxygen-limiting silo.

Additional Recommendations

  • Specialized training in proper techniques for responding to silo fires is available for fire department personnel. If your local firefighters have not had such training, encourage them to locate and participate in a training program.
  • If you no longer use a silo, make sure that it is completely empty. Residual silo material can dry out and pose a fire risk.
  • In the event of a silo fire, do not apply cool or cold water to the outside of a silo because doing so may cause structural damage.
  • After a silo fire, inspect the silo, and make any necessary repairs.

Resources

Click here for a guide to assisting firefighters at the scene of a silo fire. 

 
Use the following format to cite this article:
Silo fire prevention and management. (2015) Farm and Ranch eXtension in Safety and Health (FReSH) Community of Practice. Retrieved from http://articles.extension.org/pages/70637/silo-fire-prevention-and-manag….
 

Sources

Florida Forage Handbook. (2008). University of Florida Institute of Food and Agricultural Sciences (IFAS). Retrieved from http://edis.ifas.ufl.edu/pdffiles/ag/ag36200.pdf.

Hill, D. (2009) Silo fires—protect your investment. Pennsylvania State University. Retrieved from http://www.farmemergencies.psu.edu/SiloFires-ProtectYourInvestment2.pdf.

Murphy, D., and Arble, W. (2000) Extinguishing fires in silos and hay mows. New York: Natural Resource, Agriculture, and Engineering Service.

 
Article Contributor: 
Davis E. Hill, Pennsylvania State University–deh27@psu.edu
 
Reviewed and Summarized by:
Linda M. Fetzer, Pennsylvania State University-lmf8@psu.edu
Carol Jones, Oklahoma State University–jcarol@okstate.edu
Dennis J. Murphy, Pennsylvania State University–djm13@psu.edu
Aaron M. Yoder, University of Nebraska Medical Center–aaron.yoder@unmc.edu


Job Instruction Training


Use the following format to cite this article:

Job instruction training. (2014) Farm and Ranch eXtension in Safety and Health (FReSH) Community of Practice. Retrieved from http://articles.extension.org/pages/70638/job-instruction-training.


Safety training is important in all workplaces, and production agriculture is no different. Think about all the equipment, processes, and tasks that workers complete daily on farms and ranches across the country. Farm and ranch managers may make assumptions that workers know how to do certain jobs, but those assumptions can be wrong. As a farm or ranch manager, you are responsible for ensuring that each worker understands how to safely complete the jobs he or she must do.

Job instruction training (JIT) is a systematic, fast, and effective method for teaching your workers to do a job correctly and safely. This method of training workers through a simple breakdown of steps is easy to understand and complete. By providing such training for your workers, you could reduce the risk of an injury or death to a worker, prevent costly equipment repairs, or avoid lost work time.

JIT Planning

When planning to conduct JIT, you must choose an effective trainer, identify an appropriate location and time for the training, and determine what information to convey to the workers. A JIT trainer should be familiar with all aspects of the job and should be a safe worker. Also, a good trainer is patient and has the desire and ability to teach the necessary skills. To enhance learning, provide the training in a realistic setting, using real tools and equipment. If you are training multiple groups, ensure that the training is the same for all workers. Provide ample time in the training for the trainer to present the information and for workers to demonstrate the job and ask questions. When possible, plan to hold training sessions during a slow time of the year at your farm or ranch to allow appropriate time for instruction and interaction. Use JIT to convey to workers any new information, techniques, or processes.

Steps of the JIT Method

When conducting JIT, the trainer uses the following four steps:

  1. Preparation: Provide a positive learning atmosphere for the workers by putting them at ease, evaluating what they already know, and reiterating the importance of job safety. Treat the workers as peers.  
  2. Presentation: List and demonstrate individually each step, stressing key points, while the workers observe. Provide an opportunity for the workers to interact by asking questions. 
  3. Performance: Give the workers the opportunity to complete the steps of the process while they explain the key points. If workers cannot explain the key points, they have not internalized the instructions and explanations. They do not thoroughly understand the job and are likely to perform it incorrectly or unsafely. Repeat this step until the workers successfully explain and complete the task. 
  4. Follow-up: Monitor the workers’ performances as they complete the steps, and correct their actions before they become habits. Provide workers a means for follow-up by designating a contact person for assistance, and encourage them to ask questions as needed after completing the training.

Click the image below to view the JIT method in action.


FileQVKbNFZDnZo

Benefits of the JIT Method

A main advantage of the JIT method is that training is practical and realistic because work tasks are demonstrated in real-life settings that encourage personalized, hands-on learning. By using personalized training, you will be able to motivate your workers more easily and focus on areas of improvement or need specific to your farm or ranch. Be sure to evaluate the training session to determine whether the workers clearly understood the content and whether you should address additional areas in the future.

Resources

For information related to JIT, click here to read an article about job safety analysis.


Use the following format to cite this article:

Job instruction training. (2014) Farm and Ranch eXtension in Safety and Health (FReSH) Community of Practice. Retrieved from http://articles.extension.org/pages/70638/job-instruction-training.


Sources

Kelly, M. (2002) Job instruction training: A checklist. Retrieved from http://migashco.com/cambrian/JIT.html.


Reviewers, Contributors, and Summarized by:
Linda M. Fetzer, Pennsylvania State University–lmf8@psu.edu
Willard Downs, University of Missouri–willard@missouri.edu
Dennis J. Murphy, Pennsylvania State University – (Has since retired)
Aaron M. Yoder, University of Nebraska Medical Center–aaron.yoder@unmc.edu

Dump Truck and Trailer Safety

Dump Truck with Raised Bed


(Source: Penn State Agricultural Safety & Health)


Use the following format to cite this article:

Dump truck and trailer safety. (2014) Farm and Ranch eXtension in Safety and Health (FReSH) Community of Practice. Retrieved from http://articles.extension.org/pages/70373/dump-truck-and-trailer-safety.


Farmers and ranchers use dump trucks and trailers to transport large amounts of grain and silage between farms or to market, making it cost-effective for many agricultural operations. In addition to large trucks and trailers, farmers and ranchers use semitrailer end dump trucks, pup trailers, truck and grain trailers, and regular or long-bed straight trucks. All trucks or trailers with dumping capability use a hydraulic hoist to dump their loads (grain, sand, gravel, and so on).

Most Common Incidents

The most common dump truck or trailer incidents occur when emptying a load, when a bed is lowered unexpectedly, or when a raised bed contacts overhead power lines.

Emptying a Load

Anytime the bed of the truck or trailer is raised, it places workers at risk unless hazardous situations are controlled or eliminated. Operators need to understand that a dump truck or trailer is at a risk for a tipping incident when the bed is raised because raising the bed changes the truck’s center of gravity. Even if a dumping area is relatively flat, a tipping incident could occur if a slope is created by low tire pressure on one side or one set of tires sitting in a low area or a depression. Additional hazards that can increase the risk of a tipping incident include wind, loads that are not centered, and jack-knifed trailers. The longer the trailer, the more surface area is exposed to high winds, placing lateral pressure on the trailer and creating the potential for a tipping incident.

When filling the truck or dump trailer, evenly distribute the contents to maintain proper flow and prevent the load from shifting during unloading. When emptying, raise the bed slowly and allow the contents to slide slowly toward the rear. If the bed is raised too quickly, the rearward shift of the load could damage the lift mechanism or cause the trailer and truck to tip over. It is important not to jack-knife a truck and trailer, because doing so creates the potential for the cab to be crushed should the trailer tip.

Lowering a Bed Unexpectedly

Workers place themselves in potentially fatal situations when they move between a raised dump bed and the frame of the truck or trailer to complete maintenance or repairs or to check a problem. In this position, a worker could be fatally crushed should the bed lower unexpectedly. An operator could inadvertently lower the bed, the bed’s lift components could fail, or the hoist cylinder could collapse. To reduce the risk of an unexpected bed lowering, truck and trailer beds should be outfitted with a dump box lock bar (shown below) that mechanically blocks the bed from coming down.

Dump Truck Safety

(Source: Pennsylvania State University, Agricultural Safety and Health)

Contacting Overhead Wires

The main potential for an electrocution incident occurs when there is contact between a raised dump bed and power lines. Contact typically occurs when a truck pulls away while the dump bed is still raised. Examples of why a driver would not put the dump down include the his or her forgetting or being impatient and pulling away before the dump bed is completely down, catching the dump bed on a power line. In this scenario, the driver, if he or she remains in the truck, is normally protected from electrocution because of the insulation provided by the truck tires. Electrocution could occur if the driver were to leave the cab and be in simultaneous contact with the ground and the cab, completing an electrical circuit—as when, for example, a farmer exits the cab and steps onto the ground with his or her right foot while the left foot is still on a truck step.

If there is an emergency (for example, the truck is on fire from a downed power line) and it is necessary to exit the truck while it is in contact with power lines, jump from the truck and land with your feet together and so that your body is not in contact with both the vehicle and the ground at the same time. Then “bunny hop” away from the truck with your feet together to minimize the voltage difference traveling between your feet.

Additional Hazards Associated with Dump Trucks and Trailers

Slips, falls, and crushing incidents can occur when working around a dump truck or trailer. Workers should make sure that steps are clean of mud and debris and should use stairs and handrails when accessing the truck and trailer. Crushing injuries to fingers and hands may result from opening and closing latches on tailgates or tailgate hinges. More severe crushing injuries can occur when a worker is between the dump truck or trailer and a building or other structure.

Another potential hazard is a shear-line hazard, which occurs when a large vehicle (a dump truck, combine, or something similar) operates near a ditch bank. Large vehicles can place considerable pressure on the banks of ditches and the shoulders of lanes alongside fields. If the soil on the shoulder is weak from freezing and thawing or prolonged wet weather, the weight of a dump truck or combine could result in soil collapse and a potential tipping incident. To prevent a shear-line collapse, keep your truck or combine as far back from the edge of the ditch or drop-off as the ditch or drop-off is deep.

Loading and Unloading Recommendations

Know the recommended limits of your dump truck and do not overload it. When loading your dump truck or trailer, distribute the load evenly throughout the dump bed. If you are loading a material that has poor flow, load less material than usual and distribute slightly more material to the rear of the bed. Covering the load with a tarpaulin will reduce loss during highway travel and can make unloading of grain easier. For a dumping site, choose a level surface made of concrete or compacted soil or gravel and free from overhead power lines. Prior to raising the dump bed, ensure that the tailgate is unlocked. To avoid an electrocution incident, always wait until the dump bed is completely lowered before moving the dump truck or trailer.

Maintenance

Before you complete any maintenance, always block the truck or trailer dump bed with an approved device such as dump-box lock bars. The following items of routine scheduled maintenance should not be neglected:

  • Daily tire pressure checks
  • Checks of the lights, horn, brakes, and fluid levels
  • Inspection and repair of the suspension systems
  • Lubrication of pins and bushings
  • Removal of heavy dust from hydraulic lines
  • Inspection and repair of hydraulic lift cylinders

Operator Training

Drivers of dump trucks and trailers should be trained in the following:

  • Regular maintenance and inspection of the dump truck and trailer
  • Recognition of hazardous conditions related to load distribution, unloading surfaces, fire hazard from heavy dust on hydraulic lines, and so on
  • Hand signals and safe procedures for a two-person unloading operation

Design Features

The following design features should be considered to reduce the risk of a potential incident:

  • When possible, use a bottom dump trailer to reduce the risk of raised bed hazards.
  • Install a bed liner in the dump bed to improve the flow of material when dumping.
  • Ensure that the trailer is equipped with slope-detector monitoring equipment to limit the height that the load can be lifted on uneven terrain.
  • To reduce the risk of slip-and-fall incidents, the trailer should have view windows in the sidewalls to allow workers to monitor the load.
  • To improve accessibility, use a fold-down ladder.
  • If possible, use sealed ball bearings for tailgates, which make tailgates easier to operate.
  • Choose an electric tailgate opener rather than a roller or sliding-door tailgate.
  • Choose air suspension seats rather than spring suspension seats.
  • Equip dump trucks with backup alarms.


Use the following format to cite this article:


Dump truck and trailer safety. (2014) Farm and Ranch eXtension in Safety and Health (FReSH) Community of Practice. Retrieved from http://articles.extension.org/pages/70373/dump-truck-and-trailer-safety.


Sources

Dump truck safety. (2005) University of California. Agriculture and Natural Resources. Retrieved from http://safety.ucanr.org/files/1343.pdf.

Murphy, D. & Harshman, W. (2005) Farm dump truck and trailer safety. Penn State College of Agricultural Sciences. Retrieved from https://extension.psu.edu/farm-dump-truck-and-trailer-safety.


Reviewed and Summarized by:
Linda M. Fetzer, Pennsylvania State University – lmf8@psu.ed
William C. Harshman, Pennsylvania State University (Has since retired)
Dennis J. Murphy, Pennsylvania State University (Has since retired)
Aaron M. Yoder, University of Nebraska Medical Center – aaron.yoder@unmc.edu
Robert A. Schultheis, University of Missouri – schultheisr@missouri.edu 

Richard J. Brzozowski

Growing up in rural New Hampshire, Richard Brzozowski was always interested in farming.  Not being from a farm family, he sought to learn all he could about agriculture.  He enrolled in 4-H at the earliest age he could.  He then went off to agricultural college and has degrees in applied animal science, fruit & vegetable science, agriculture, and agriculture education from land grant institutions in New Hampshire, Massachusetts and Missouri.  He is a US Navy veteran having served as a Builder 2nd Class Petty Officer in the Seabees.  He taught vocational agriculture at the high school level for two years.  Since 1987, he has served as the county agriculture educator in Cumberland County, Maine for the University of Maine Cooperative Extension.  His Extension work includes a wide range of programming from consumer horticulture to sustainable agriculture.  He is currently involved in research projects that include sheep foot health, applied poultry science and agritourism.  He oversees Maine AgrAbility.

Contact Information

Email: richard.brzozowski@maine.edu