Use the following format to cite this article:
Rollover protective structures. (2013). Farm and Ranch eXtension in Safety and Health (FReSH) Community of Practice. Retrieved from http://www.extension.org/pages/66325/rollover-protective-structures.
Tractor rollover incidents account for approximately half of all tractor-related fatalities across the country. A rollover protective structure (ROPS) fits on an agricultural tractor and protects the operator in the event of a rollover.
A tractor’s ROPS and seat belt work in conjunction to secure the operator in a protective zone, reducing the operator’s risk of being crushed under the tractor should it overturn. In most situations, the ROPS limits the overturn to little more than 90 degrees.
Although tractors built after 1985 are equipped with ROPSs and seat belts, many farmers and ranchers use older tractors that are not equipped with these safety devices. According to Occupational Safety and Health Administration (OSHA) guidelines, farm and ranch owners are required to have a ROPS and seat belt installed on all tractors operated by employees.
ROPS: Type and Structure
There are three types of ROPS, all of which protect the operator in the event of a rollover:
- two-post ROPS
- four-post ROPS
- ROPS with enclosed cabs
Two-Post ROPS

(Two-post ROPS. Source: Pennsylvania State University. Agricultural Safety and Health)
The two-post ROPS (pictured above) is the most common type of ROPS. The upright posts are typically vertical or slightly tilted and are mounted to the rear axle. Two-post ROPSs are either rigid or foldable.
- A foldable ROPS has a specially designed hinge that allows the ROPS to fold to fit in low-clearance areas.
- You must raise and lock the foldable ROPS after completing activities in low-clearance areas.
- A foldable ROPS that is not in its upright position will not provide protection during a rollover.
Four-Post ROPS
A four-post ROPS is mounted on both axles and on the frame in front of the operator. Occasionally, a four-post ROPS is mounted to the tops of specially reinforced flattop rear fenders.
ROPS with an Enclosed Cab
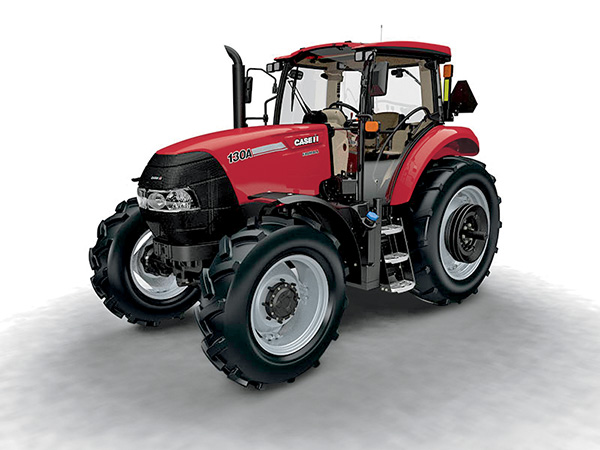
Typically, a tractor is outfitted with a ROPS with an enclosed cab by the manufacturer—the tractor’s cab structure is designed to act as a ROPS. As sales of tractors with cabs have increased, ROPSs with enclosed cabs have become more common.
Falling Object Protective Structures
A falling object protective structure (FOPS) is a canopy specially designed to protect the operator from falling objects. FOPSs are especially recommended for use on front-end loaders and when working in wooded areas or other situations that may involve falling objects.
Most FOPS are used on tractors with four-post ROPS or ROPS with enclosed cabs.
Retrofitting Older Tractors
Most tractors built before 1985 can and should be retrofitted with ROPS and seat belts. Check with your local dealership or manufacturer to determine the availability of ROPS retrofit kits. You may also click here to access the University of Kentucky ROPS Guide to determine whether a ROPS is available for your tractor. You should have technicians at a dealership install any aftermarket ROPS.
ROPS Safety Standards
Do not use a homemade ROPS on your agricultural tractor; it will not provide you with the necessary protection in the event of a rollover and may pose liability issues.
Manufacturers have designed and tested ROPS to meet specific standards developed by the Society of Automotive Engineers (SAE), the American Society of Agricultural Engineers (ASAE)—now called the American Society of Agricultural and Biological Engineers (ASABE)—and other organizations. These standards indicate that a ROPS has passed specially designed crush, static, and dynamic tests that confirm its effectiveness.
ROPS must meet the following standards:
- SAE J2194
- OSHA 1928.51
In Canada, ROPS must meet the following standards:
- Canadian Standards Association (CSA) B352.0
- Canadian Standards Association (CSA) SA 352.1
- Two- and four-post ROPS should have labels applied directly to the posts.
- The label on a ROPS with enclosed cab should be located on the edge of the cab door.
ROPS Maintenance
A factory-installed ROPS should never be structurally modified (that is, cut, welded, and so on). Such modifications can impact the integrity of the ROPS and impair its effectiveness in a rollover.
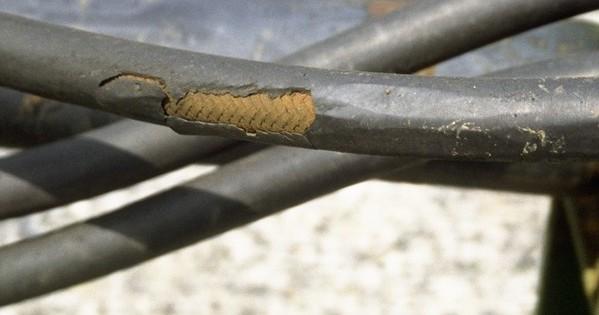
Periodically check the ROPS and seat belt on each tractor for signs of wear such as rust and cracks. Contact the dealership regarding the best way to properly correct any issues.
Resources
Click here to learn about aftermarket ROPS rebate programs available in certain areas of the United States.
Use the following format to cite this article:
Rollover protective structures. (2013). Farm and Ranch eXtension in Safety and Health (FReSH) Community of Practice. Retrieved from http://www.extension.org/pages/66325/rollover-protective-structures.
Sources
American Society of Agricultural and Biological Engineers (ASABE), 2012. ANSI/ASAE S478.1. Roll-Over Protective Structures (ROPS) for Compact Utility Tractors. St. Joseph, MI. Retrieved from http://www.elibrary.asabe.org.
Murphy, D. and Buckmaster, D. (2003) Rollover protection for farm tractor operators. Penn State College of Agricultural Sciences, Agricultural and Biological Engineering. Retrieved from https://extension.psu.edu/rollover-protection-for-farm-tractor-operators.
The Kentucky ROPS Guide. (2010) Southeast Center for Agricultural Health and Injury Prevention, University of Kentucky. Retrieved from http://rops.ca.uky.edu/?utm_medium=301&utm_source=warehouse-page.